Get started
From zero to a working gateway.
Eight short steps: run the router, install your first MCP server from the registry, confirm it's live, test its tools in the UI, and point your client at it. No config spelunking — every step has a screenshot.
Run the router
MCP Router ships as a single container. Pick whichever start fits — all three land you on the same
web UI at http://localhost:3000. State lives in ./data (bind-mounted to
/data in Docker), so nothing is hidden away.
Prebuilt image — no clone
docker run -d -p 3000:3000 -v ./data:/data \
  -e MCP_ROUTER_TOKEN=your-secret-token \
  vantreeseba/mcp-router:latest
Docker Compose — from the repo
git clone https://github.com/cubicecho/mcp-router mcp-router && cd mcp-router
cp .env.example .env      # set a real MCP_ROUTER_TOKEN
docker compose up -d
Bare Node Node ≥ 22.18
npm install && npm run build
MCP_ROUTER_TOKEN=your-secret-token npm startdata/config/settings.json and printed
to the log once at startup. On a trusted local network you can skip auth entirely with
SECURE_LOCAL_NET=true.
Open the UI and sign in
Visit http://localhost:3000 and paste your bearer token when prompted — it's the same
MCP_ROUTER_TOKEN from step 1, and it guards both the management API and every MCP endpoint.
You'll land on the Servers page. On a fresh install it's empty; that's what the next
step fixes.
Install your first server
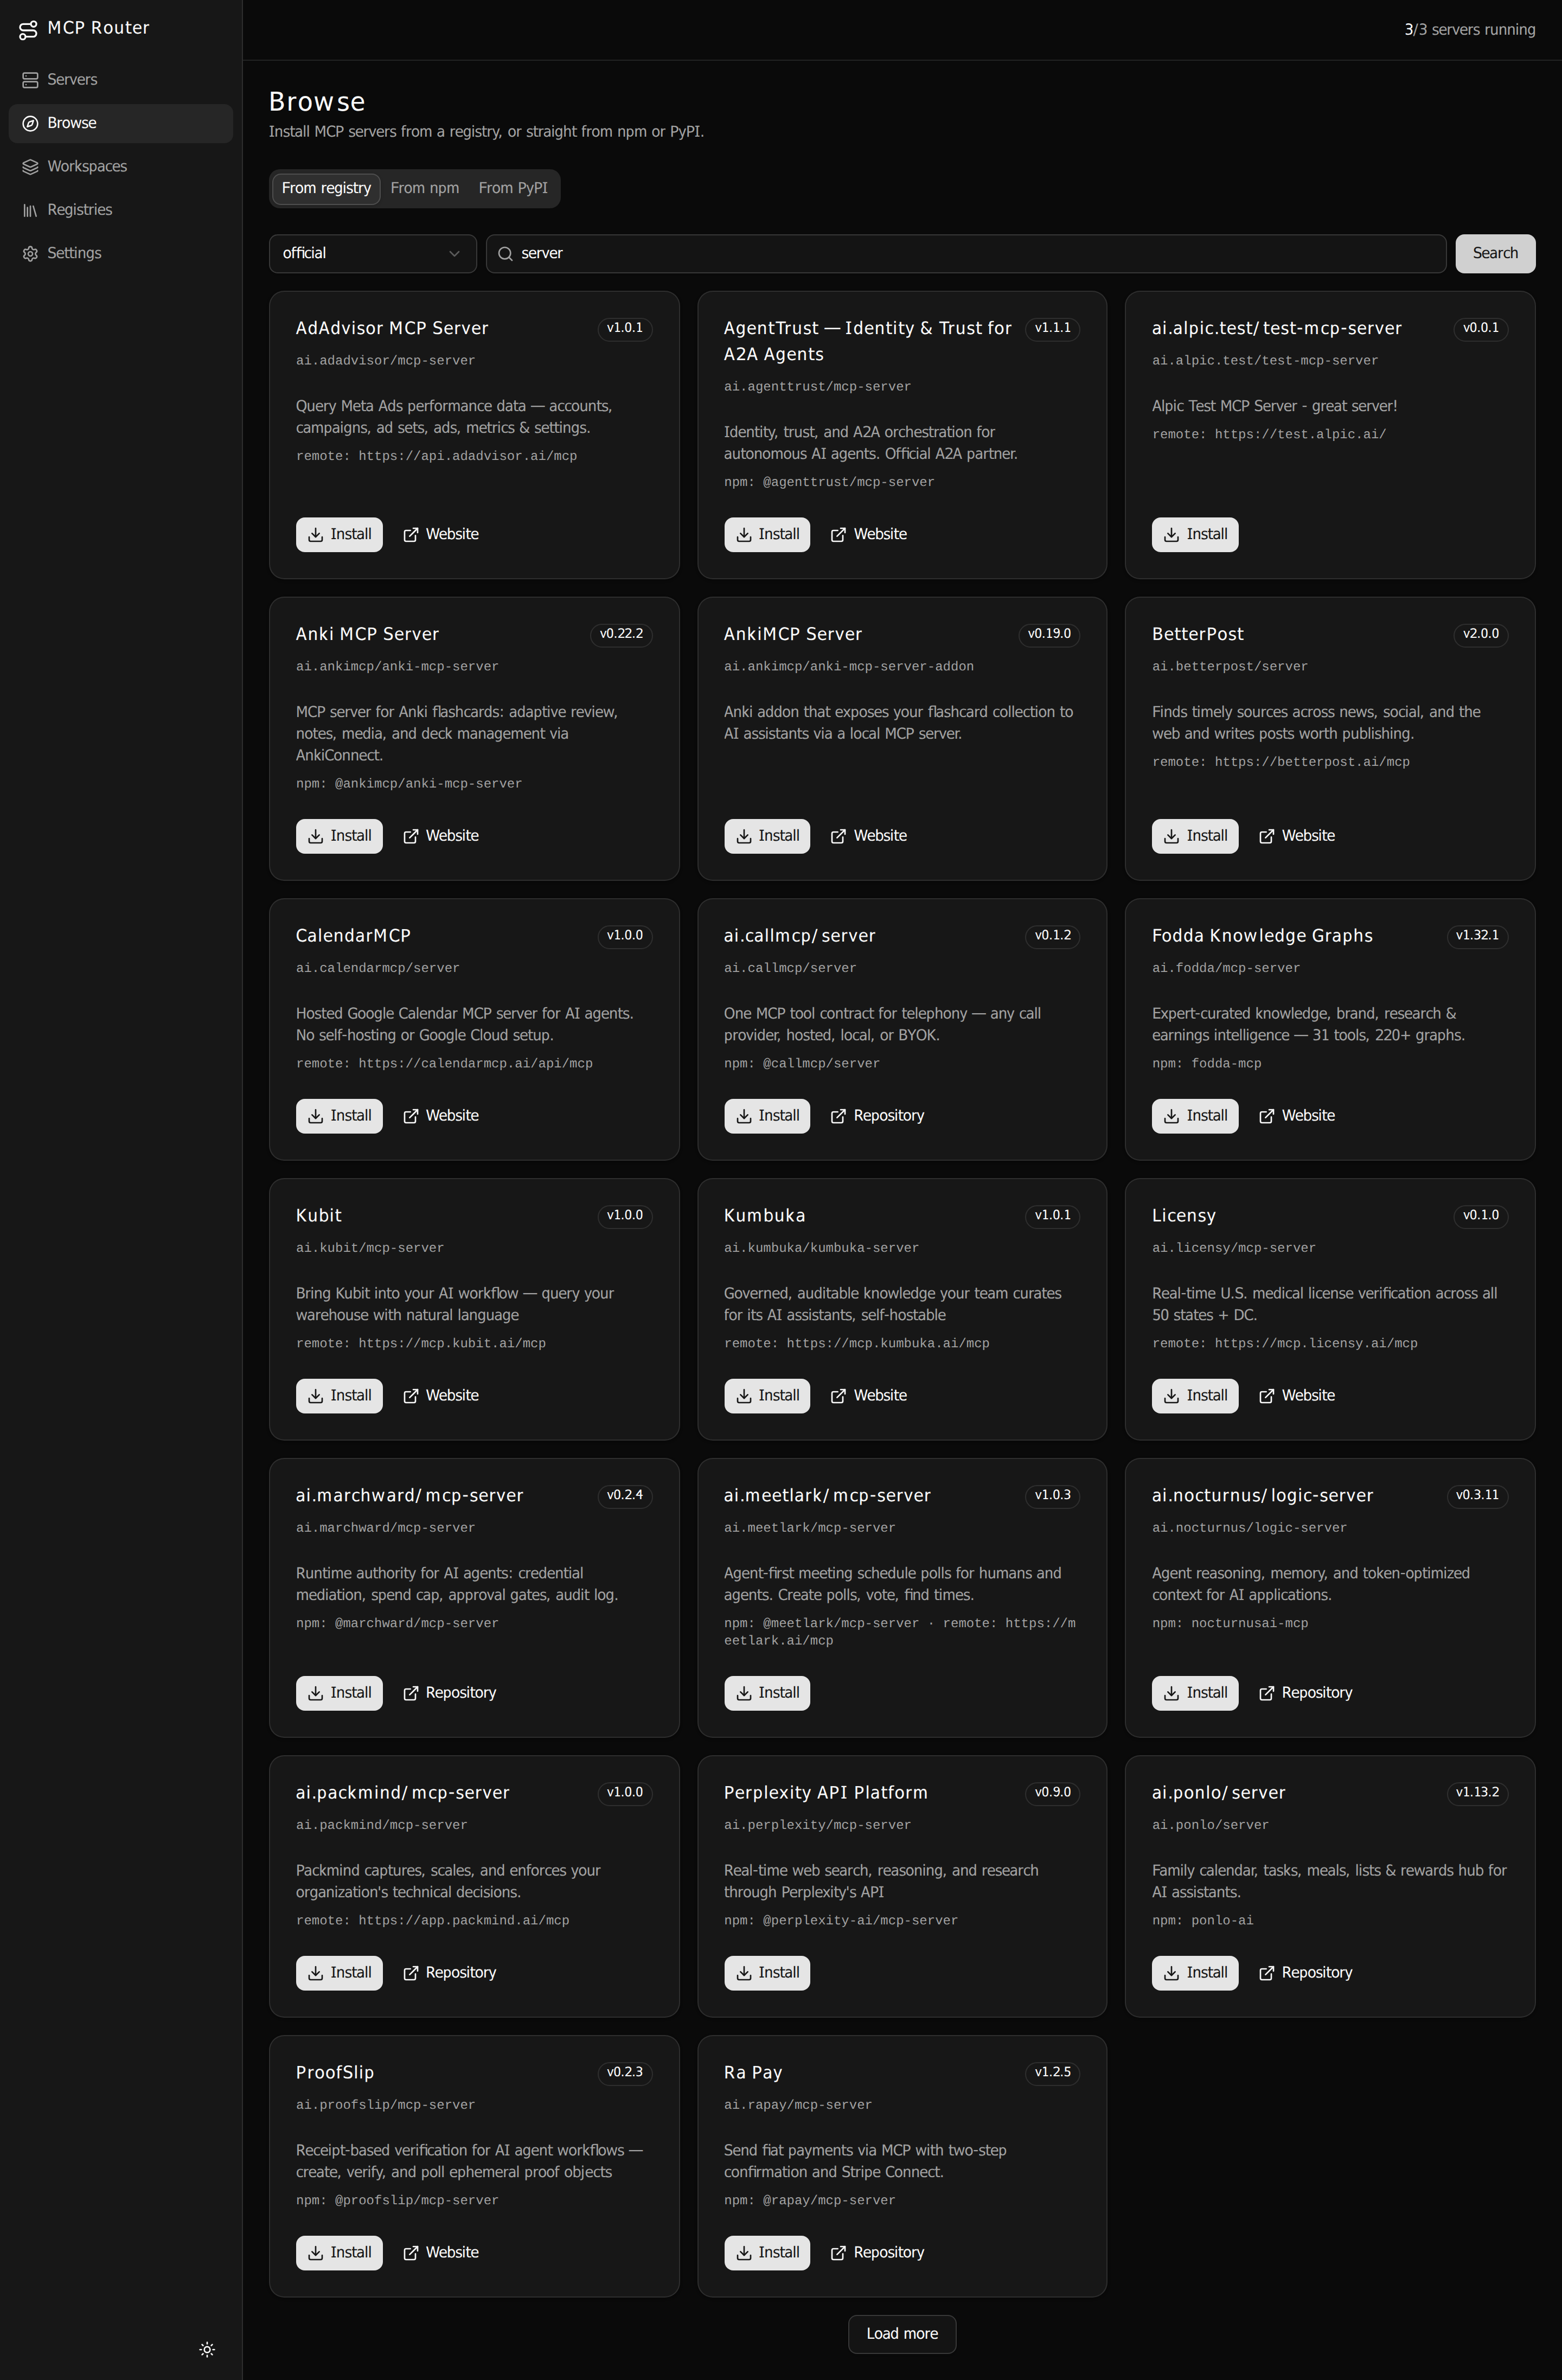
Open Browse and search the official MCP registry (or switch to the From npm /
From PyPI tabs to install a package directly). For a first run, grab the
Everything reference server — it's purpose-built for testing a client, with tools like
echo and get-sum.
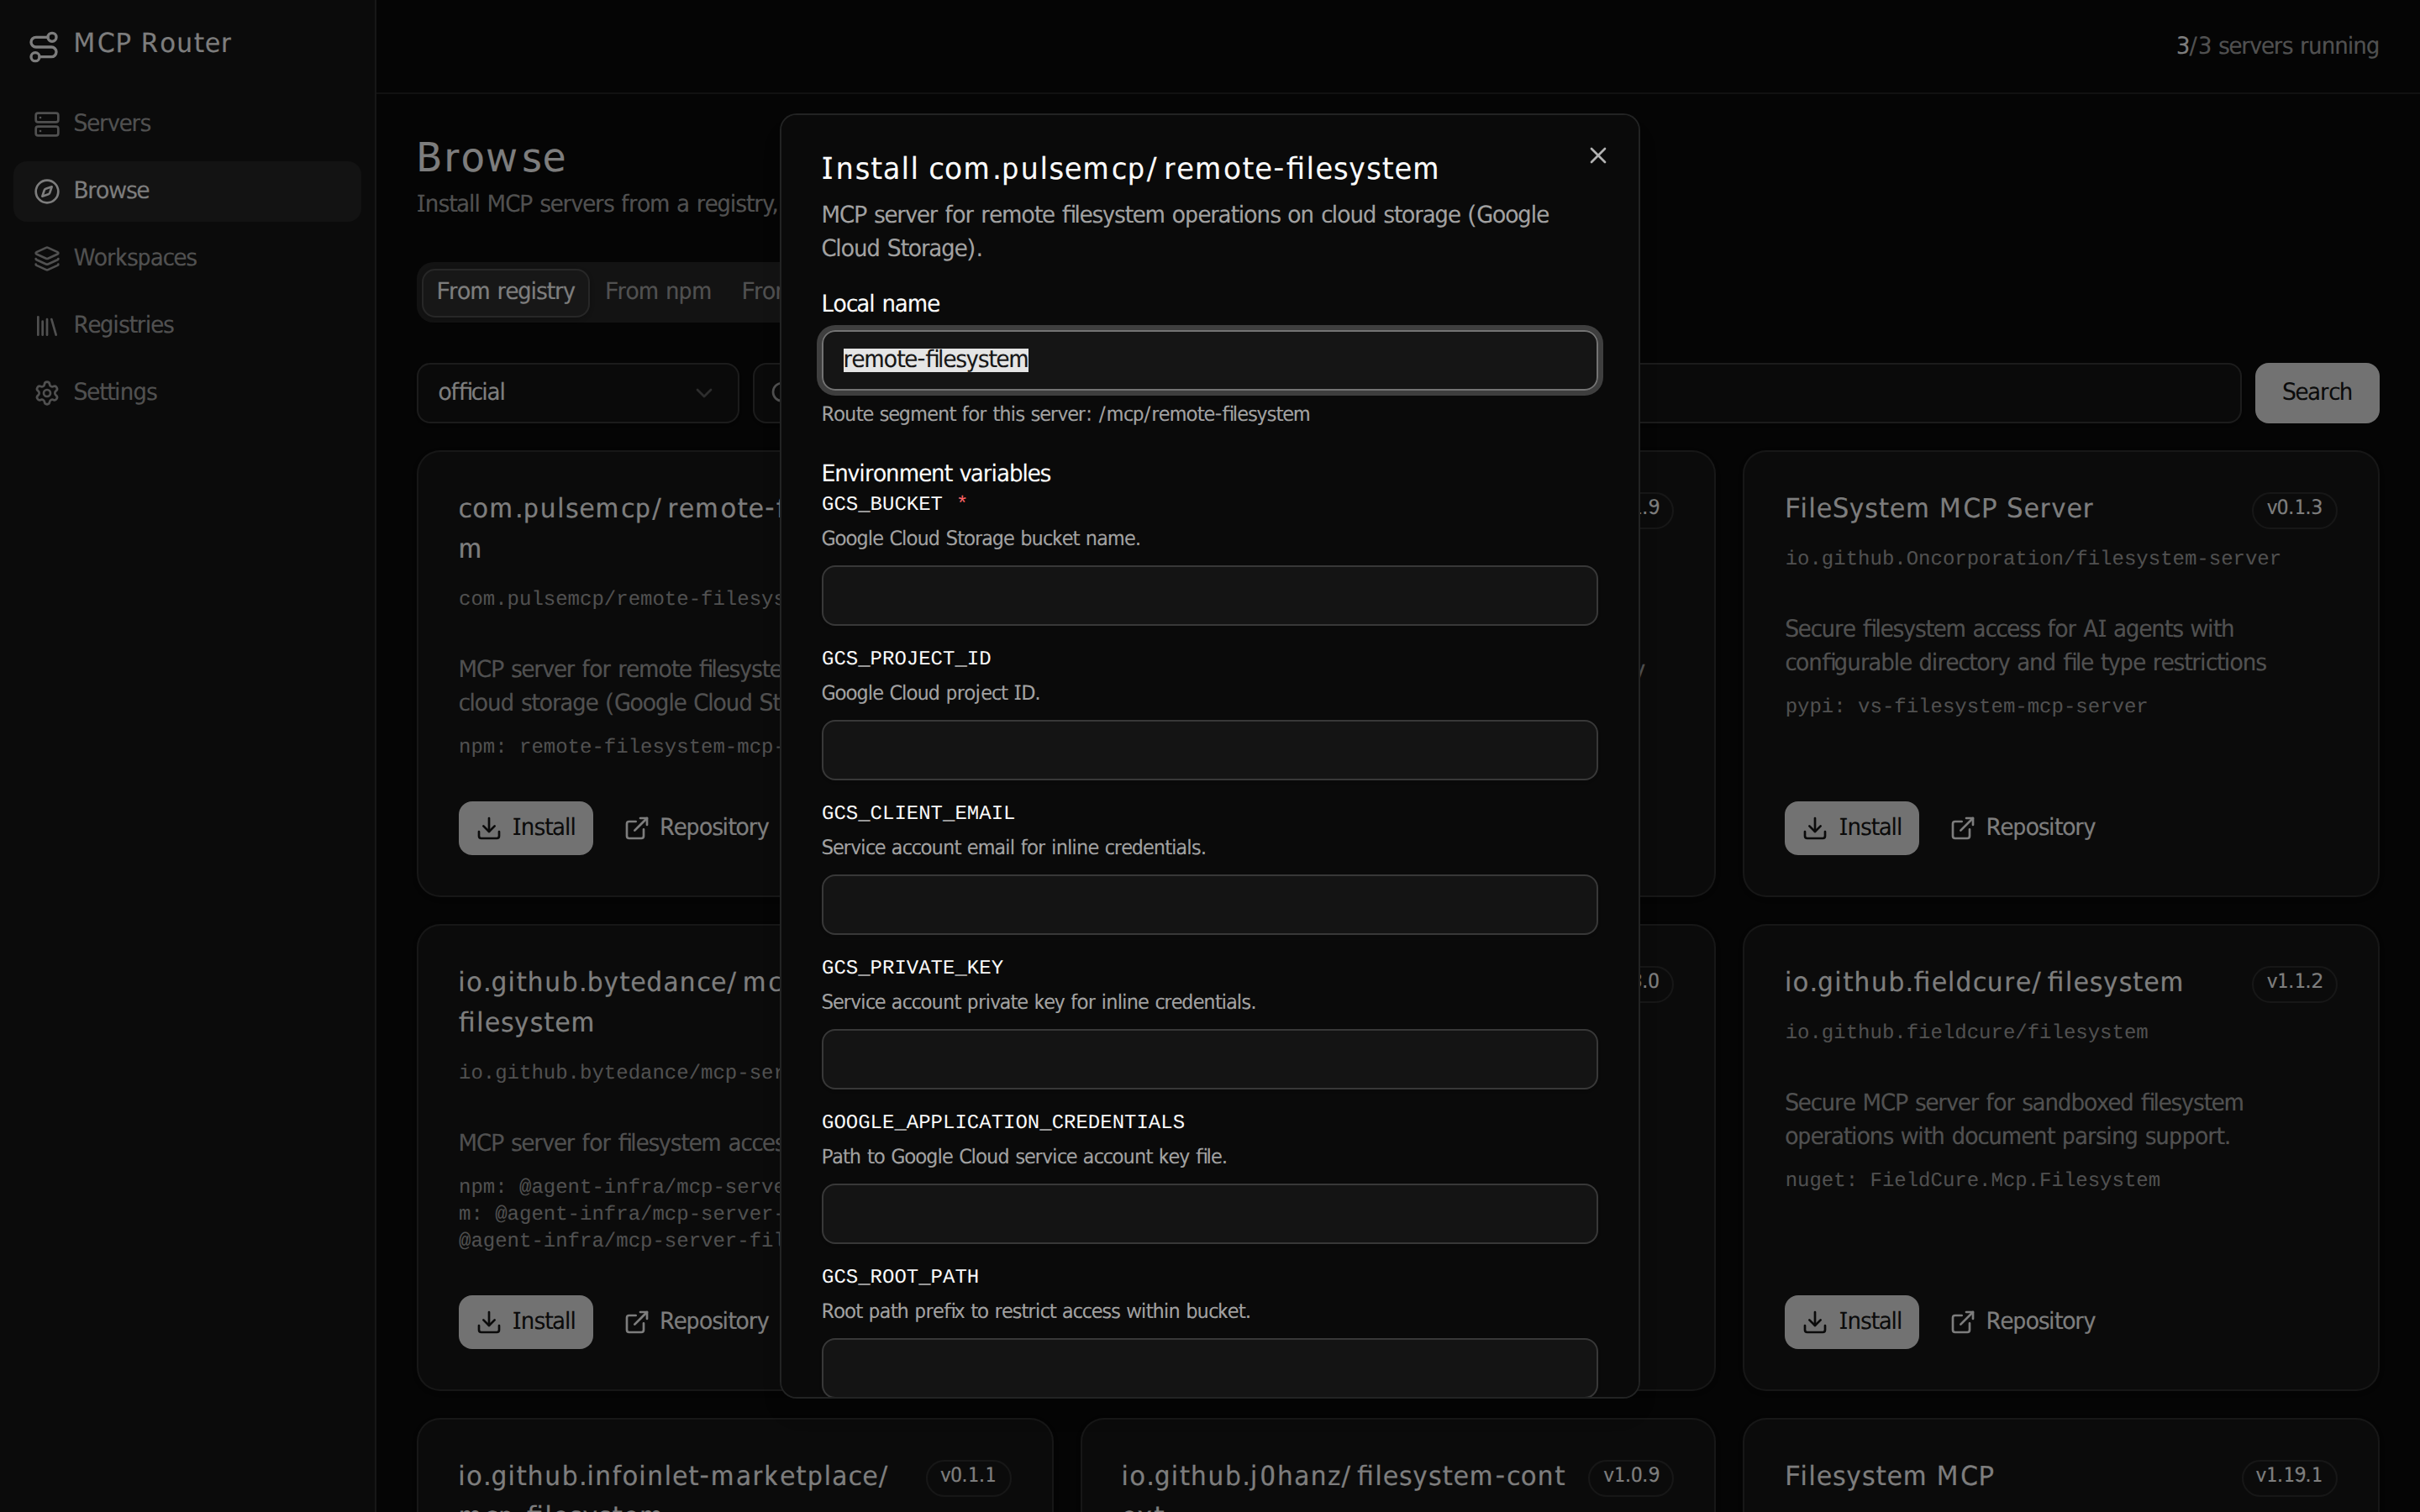
The install dialog lets you pick a local name (the route segment, e.g.
/mcp/everything) and fill in any environment variables the server needs — API keys go here,
stored with file mode 0600.
npx …) or point at a remote streamable-HTTP URL to proxy.
Confirm it's running
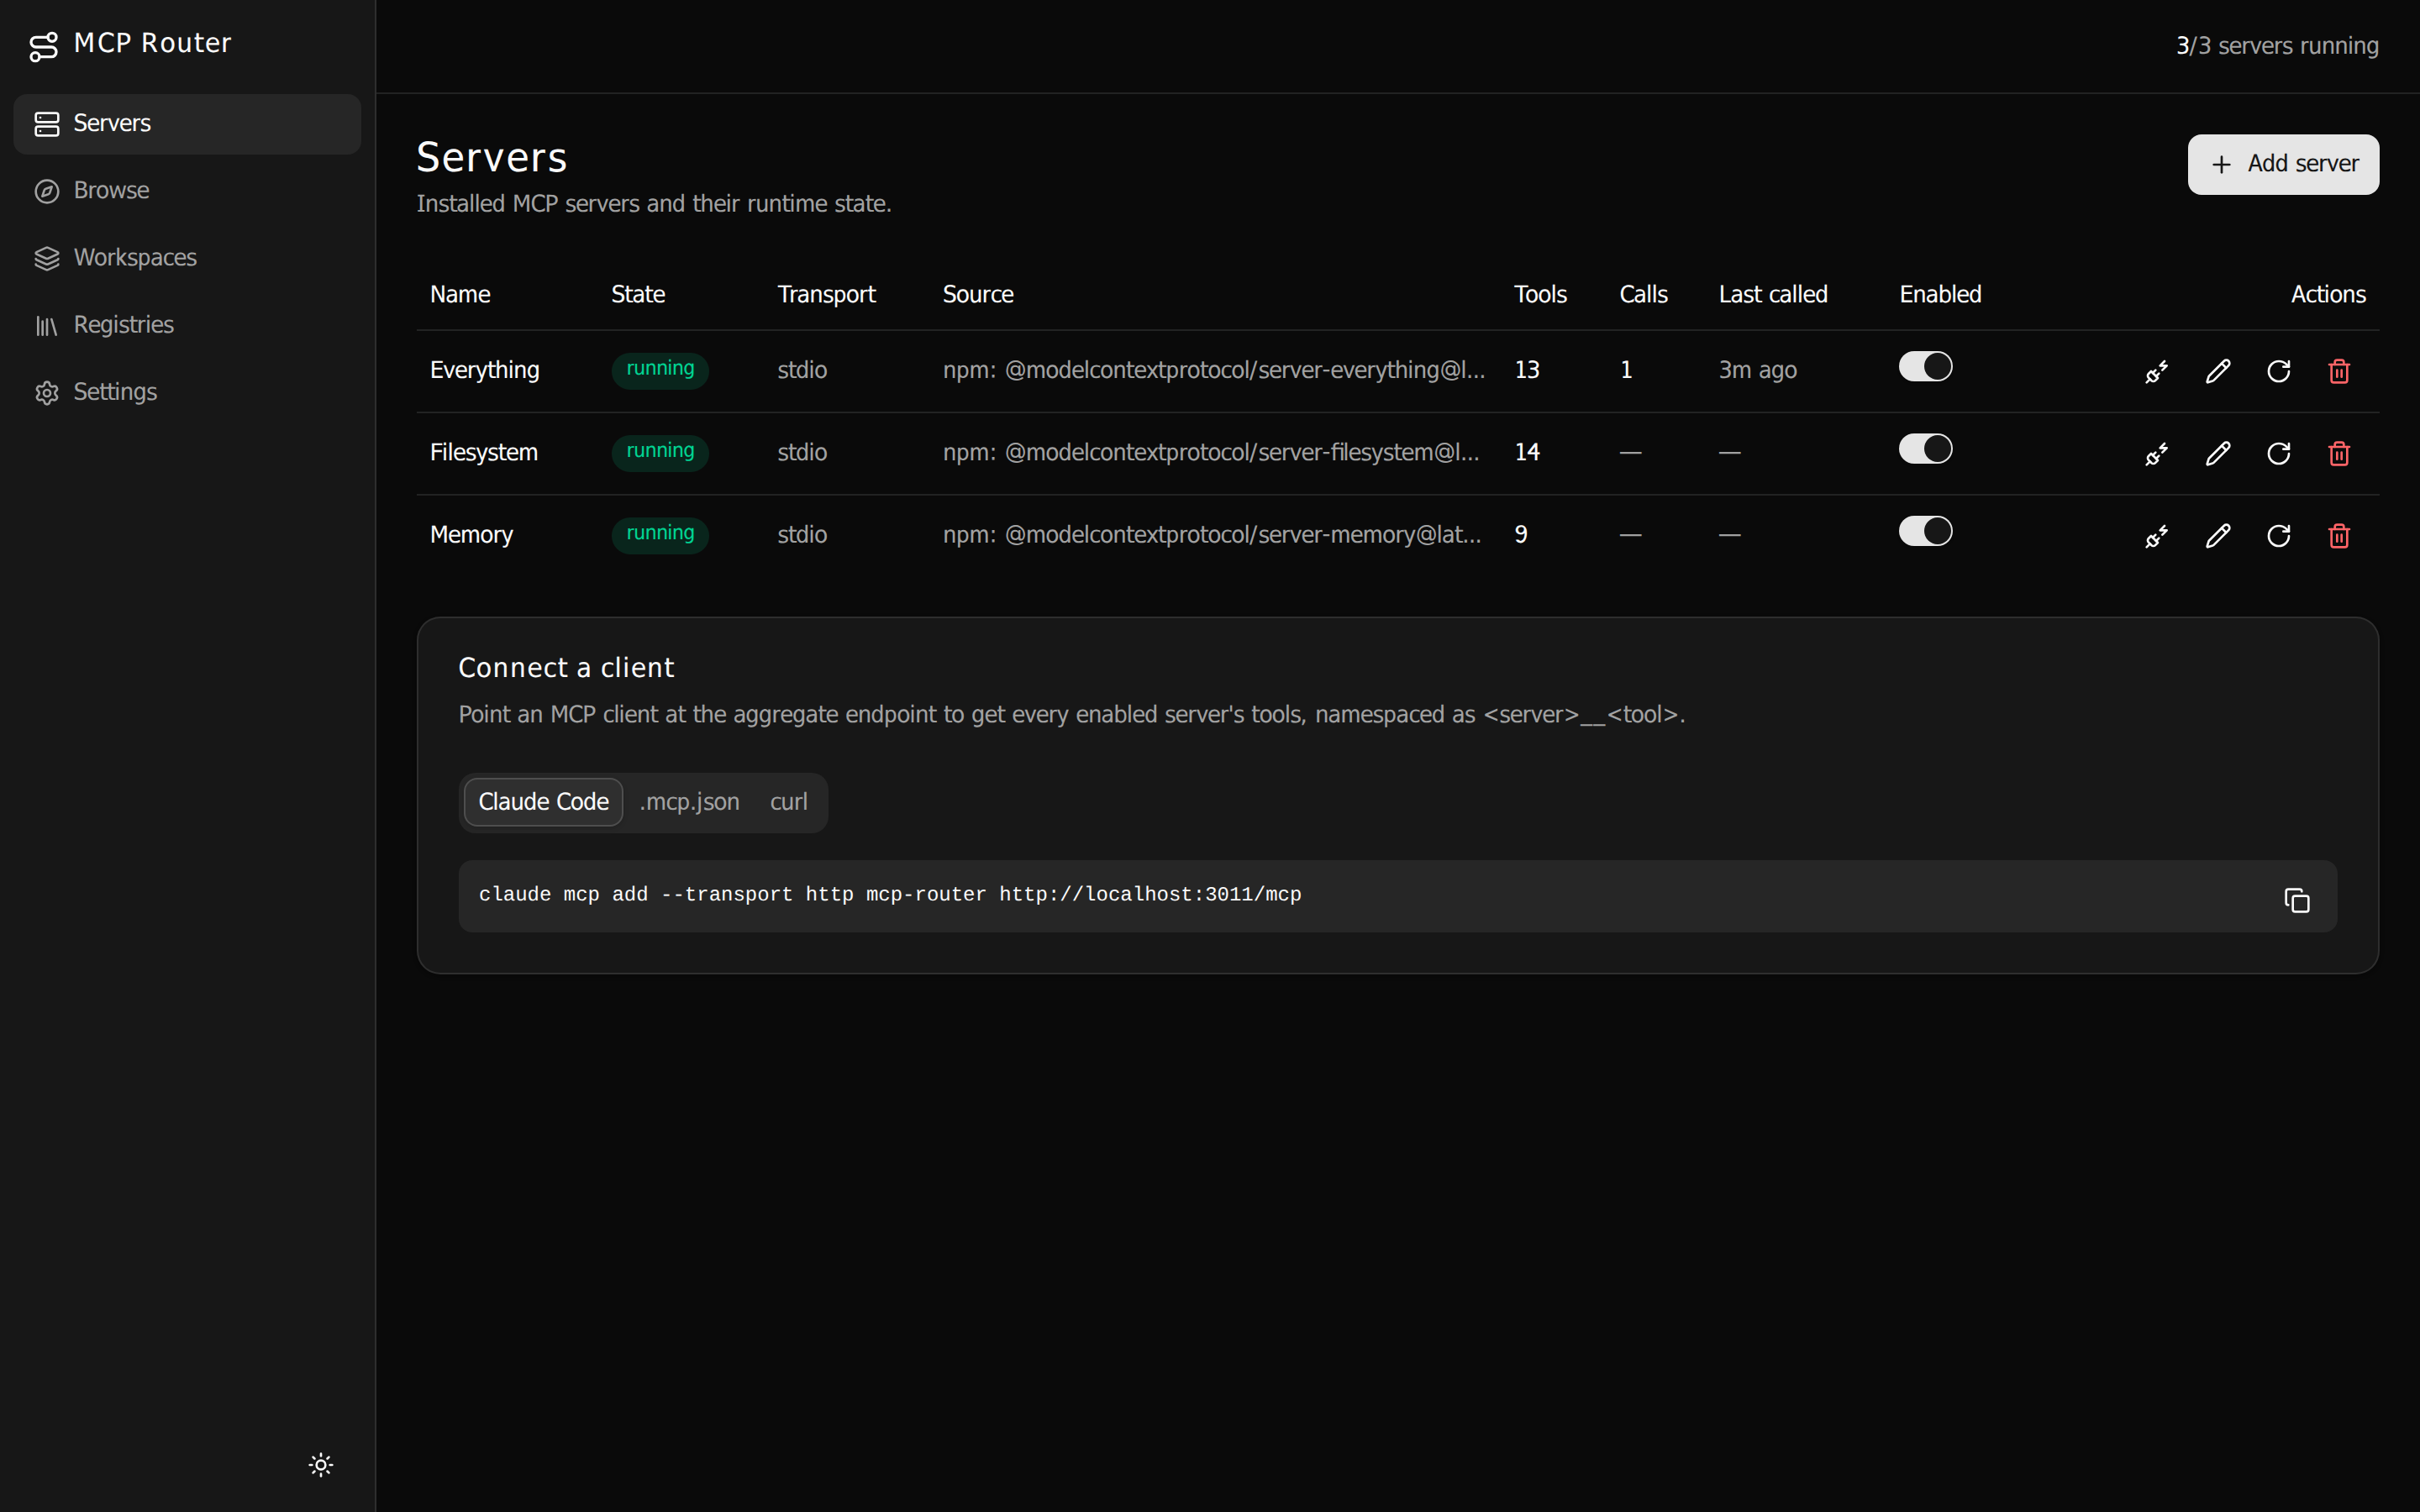
Back on Servers, your new server appears in the list. stdio servers spawn lazily on the first request and stay warm — the tool count, call count, and last-called time fill in once it's been hit. The header shows how many servers are live at a glance.
Test it right in the UI
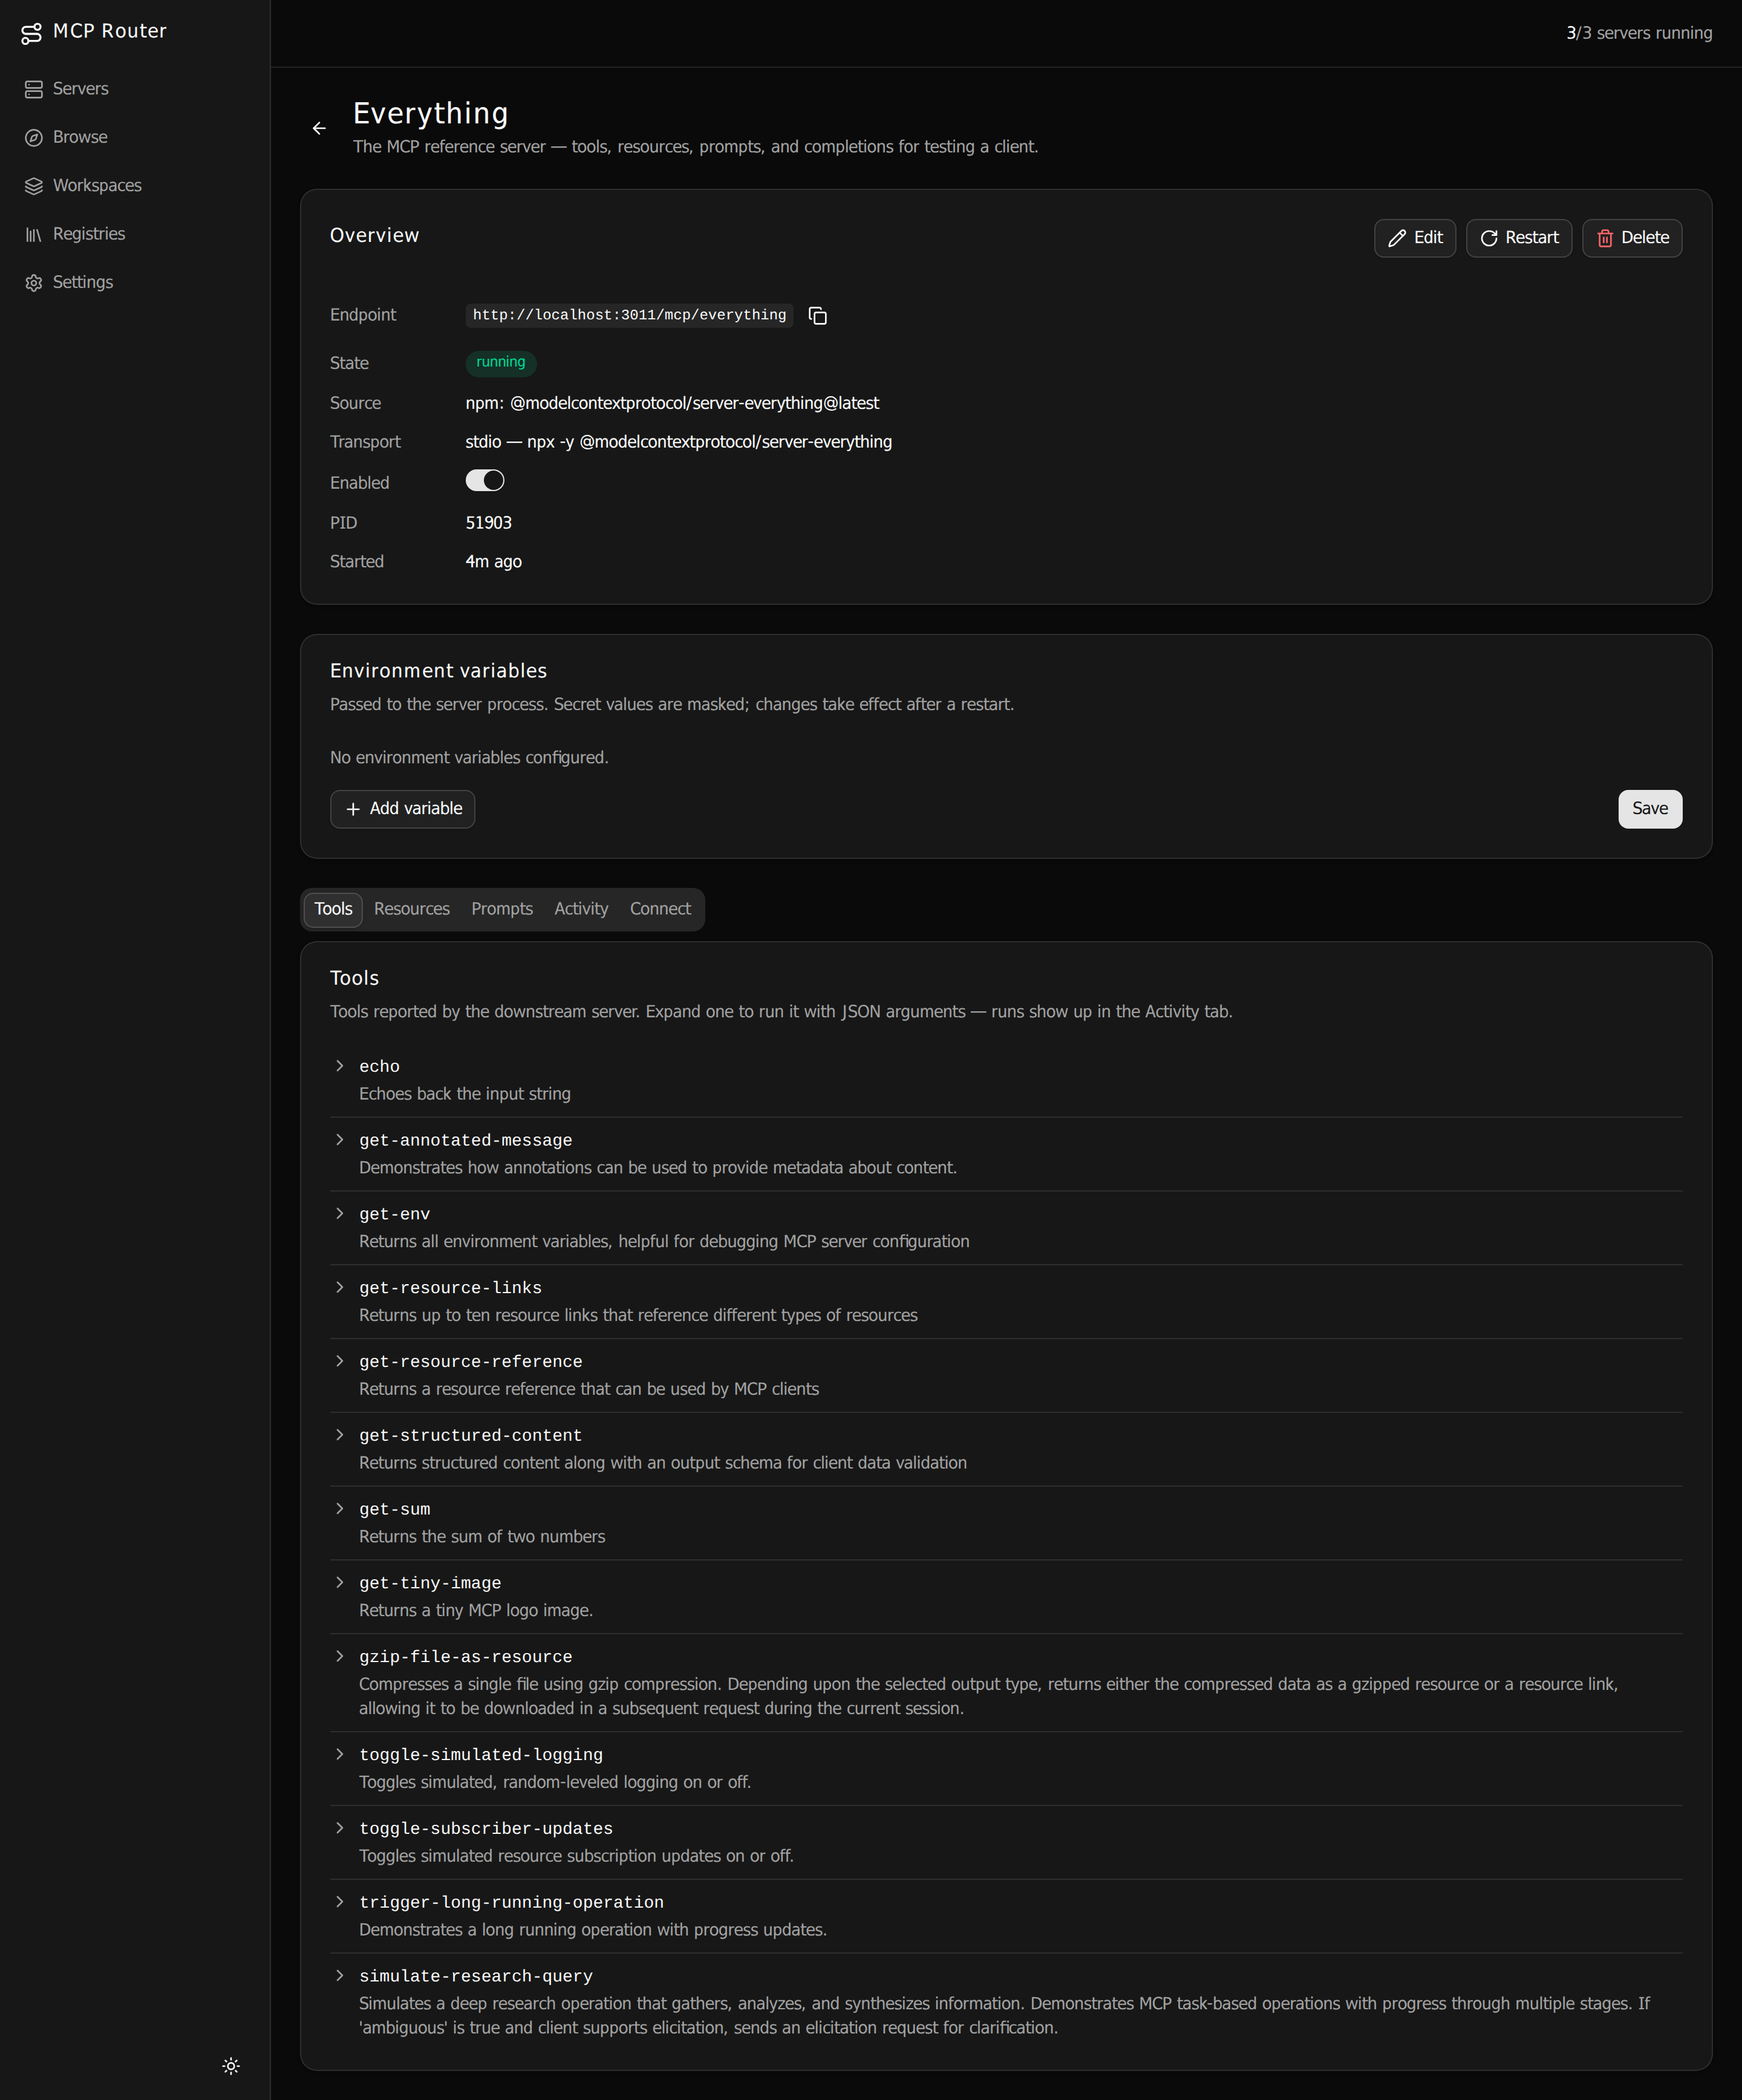
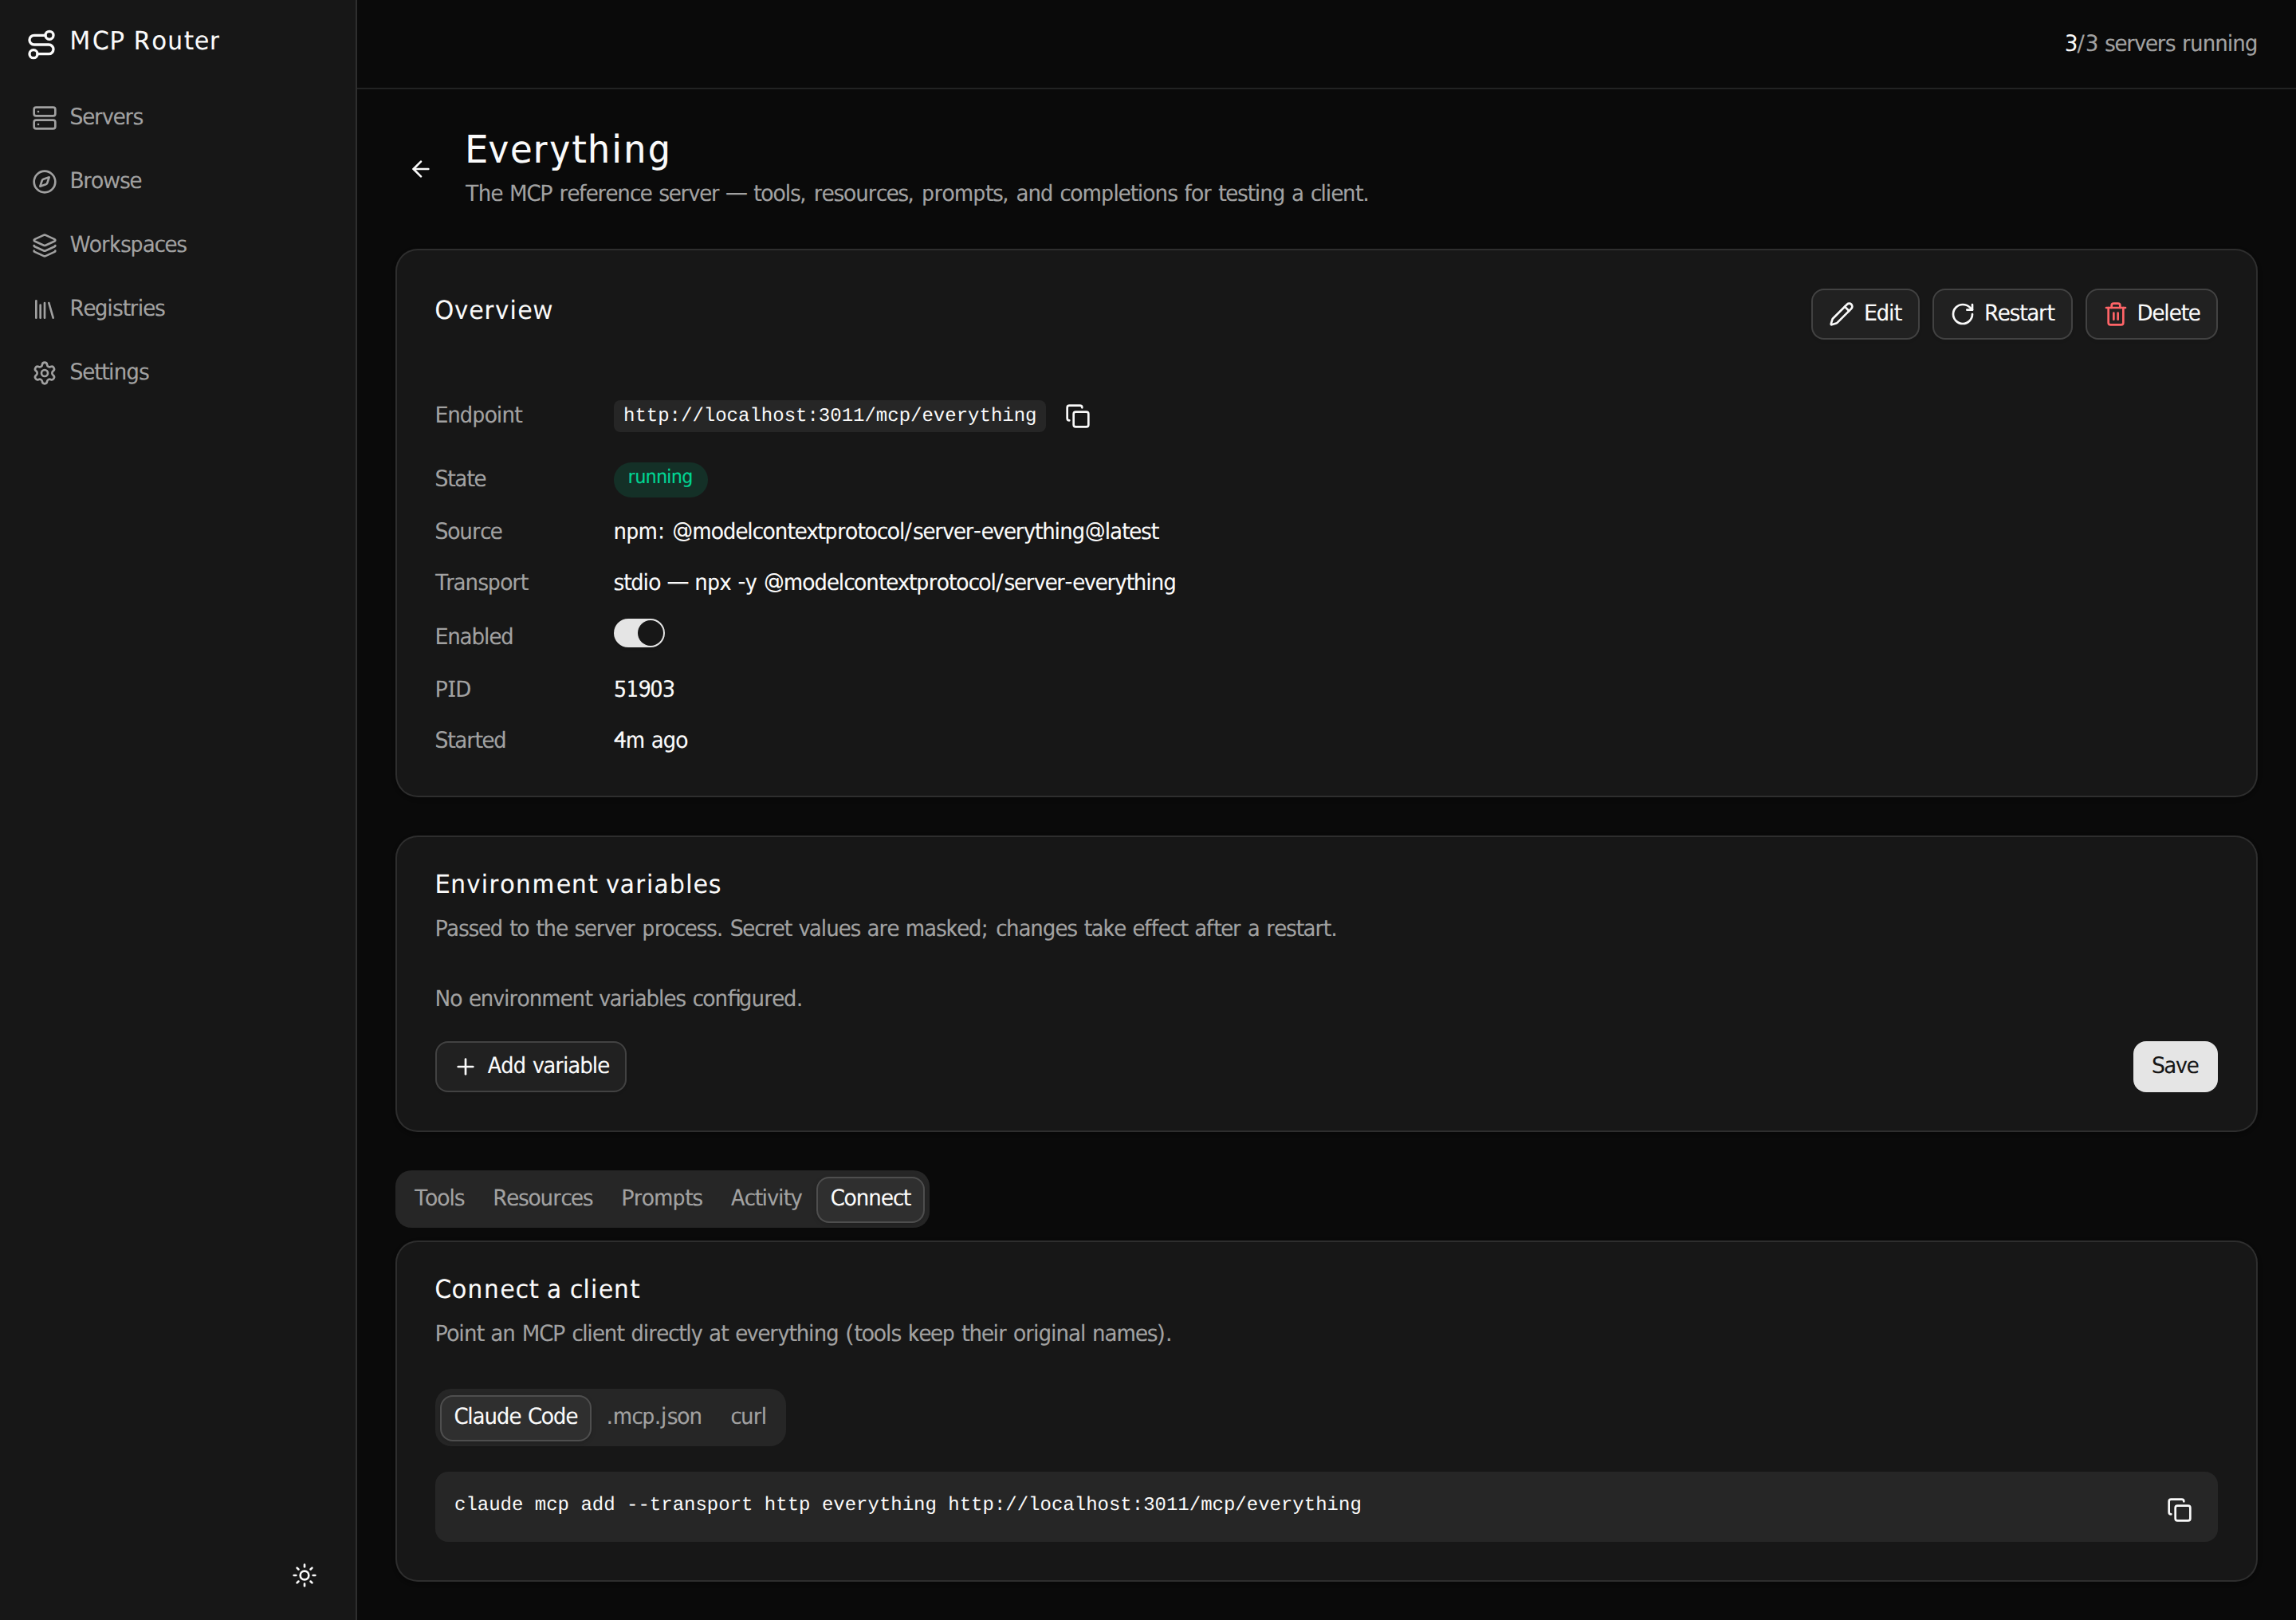
Click a server to open its detail page. The Tools tab lists everything the downstream server exposes — expand any tool, pass JSON arguments, and run it. Runs land in the Activity tab so you can see exactly what came back. This is your proof the server works before any client touches it.
Connect your client
The Connect tab hands you a ready-to-paste snippet for Claude Code, a raw
.mcp.json block, or a curl call — already filled in with this server's URL.
Point a single server, un-namespaced:
Prefer everything at once? Point your client at the aggregate — every enabled server
merged, tools named <server>__<tool>:
claude mcp add --transport http router http://localhost:3000/mcp \
  --header "Authorization: Bearer <token>"
That's a working setup: an installed server, tested, and connected to your client.
Optional: group servers into a workspace
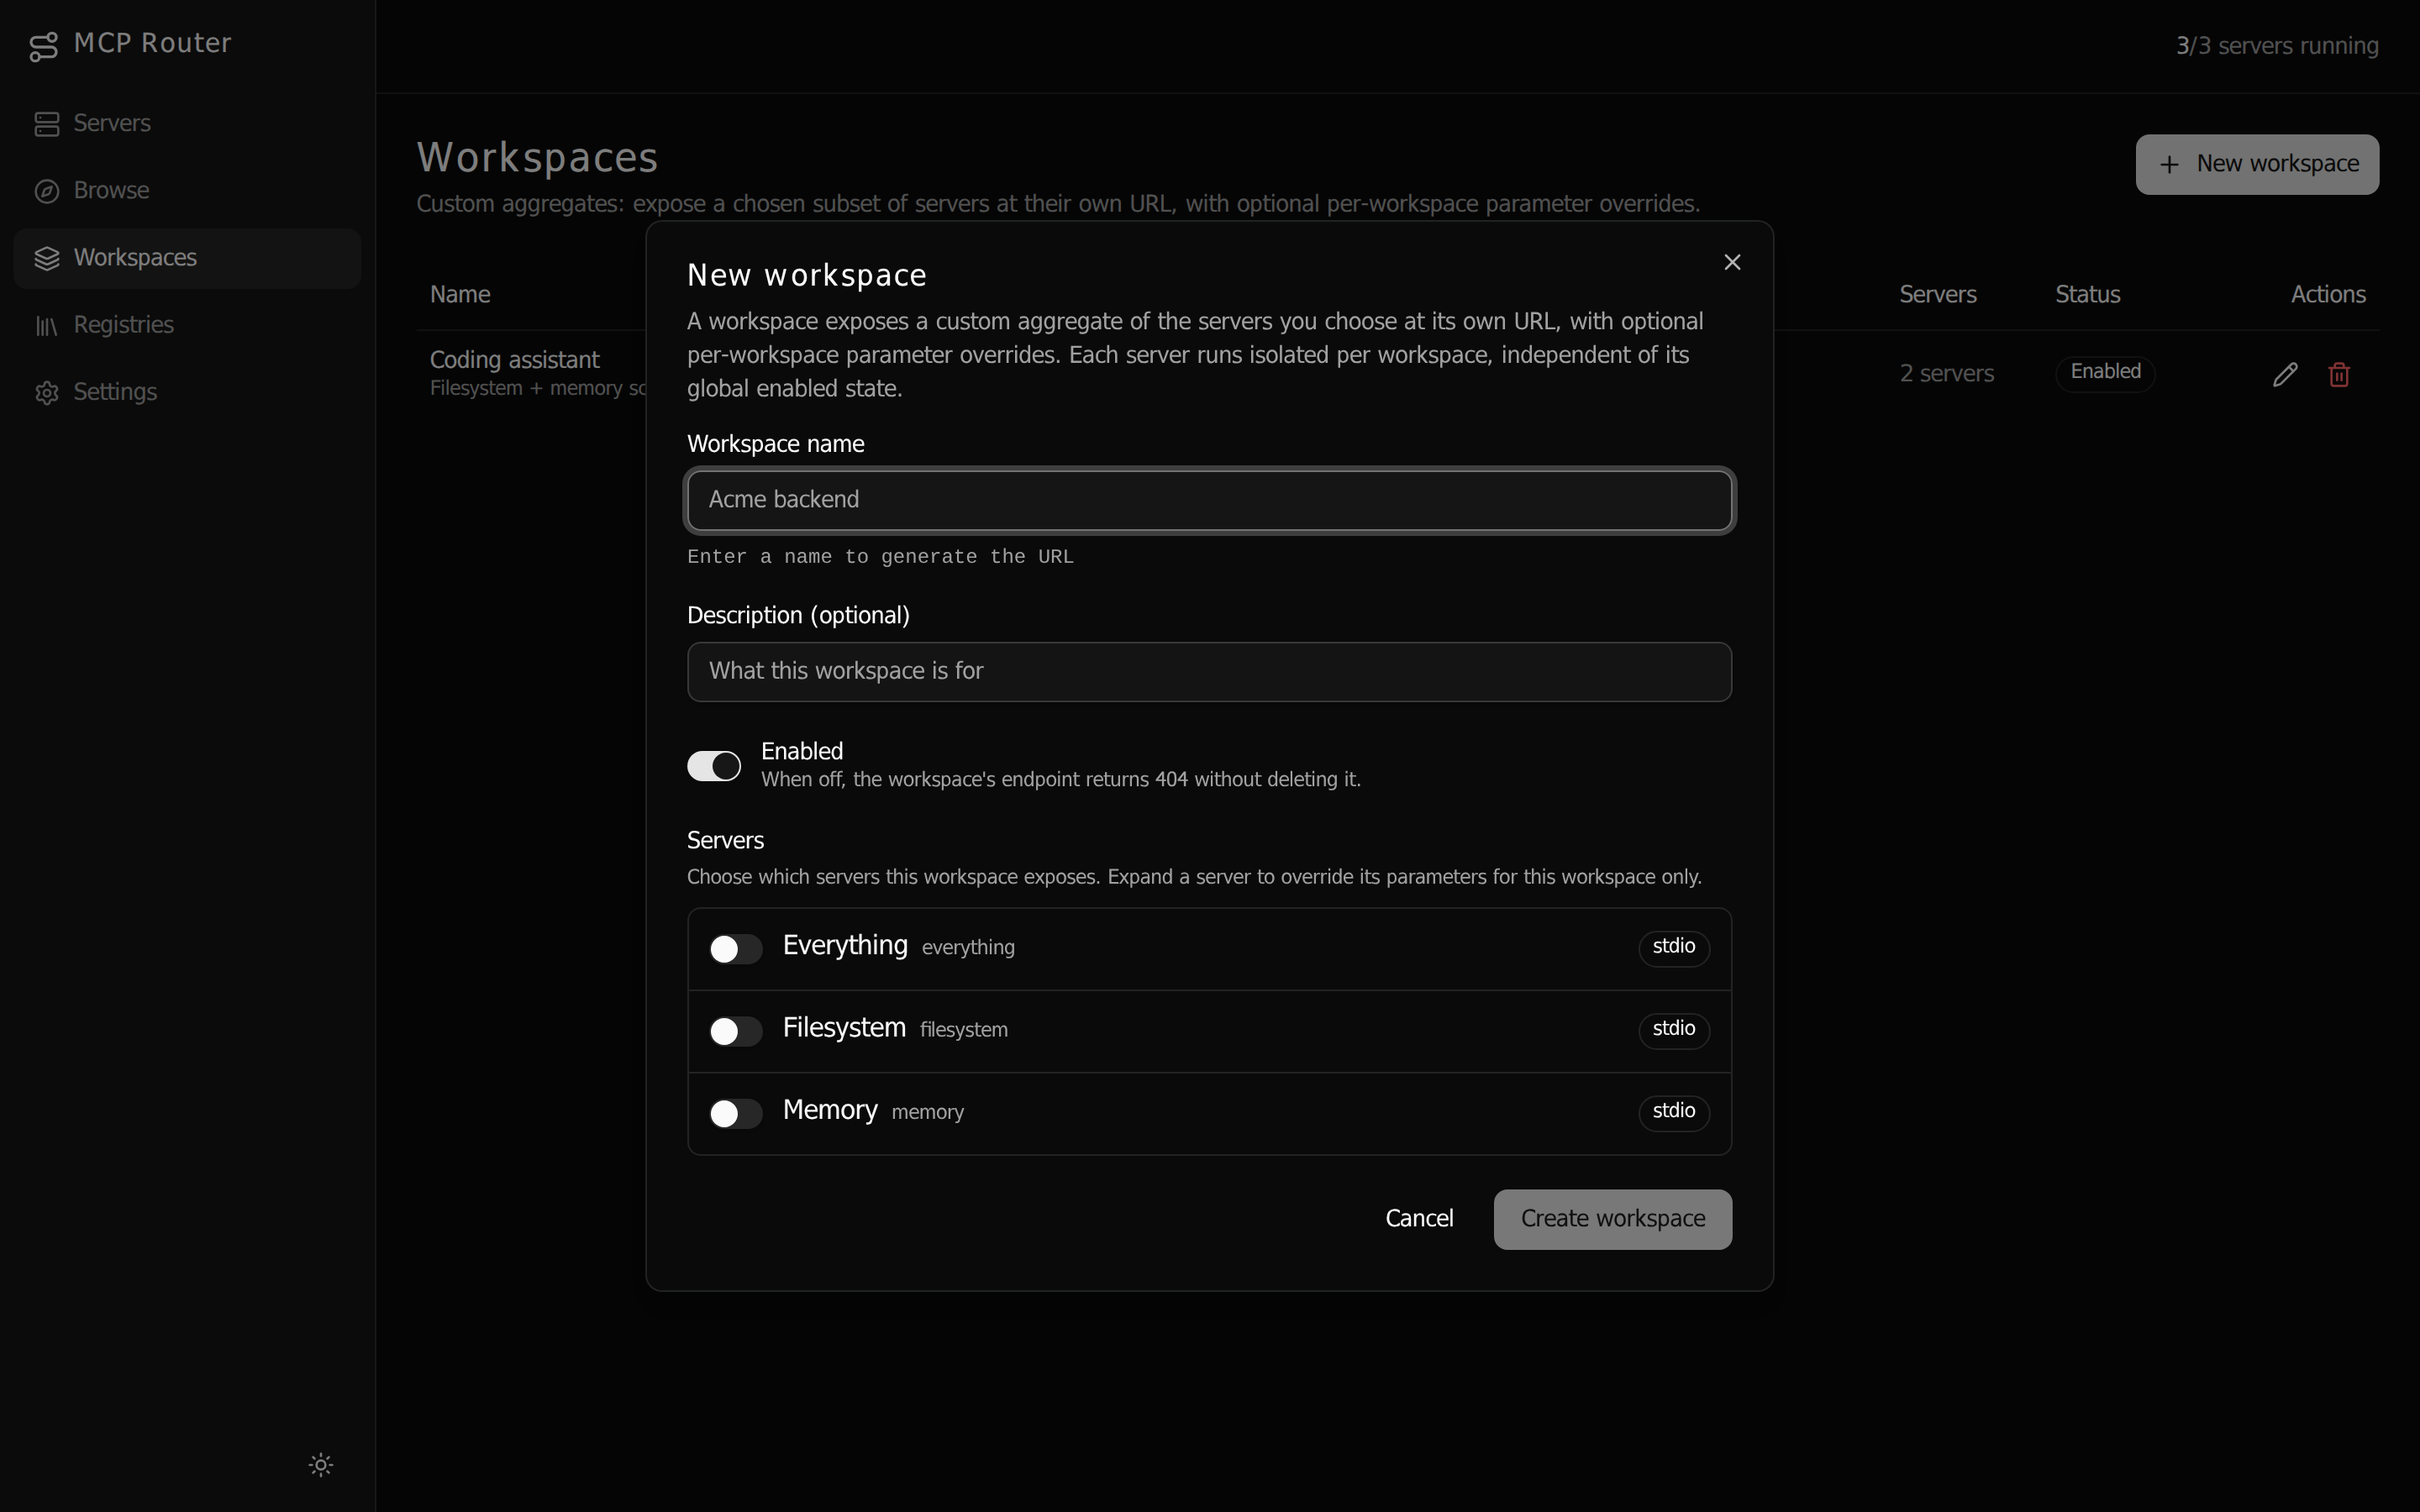
Once you have a few servers, a workspace bundles a chosen subset into a custom aggregate
at its own /mcp/w/<slug> URL — so each client sees exactly the tools it should. Open
Workspaces → New workspace, name it, and toggle on the servers to include.
The workspace detail page shows its endpoint and the merged, namespaced tool list — ready to connect just like a single server:
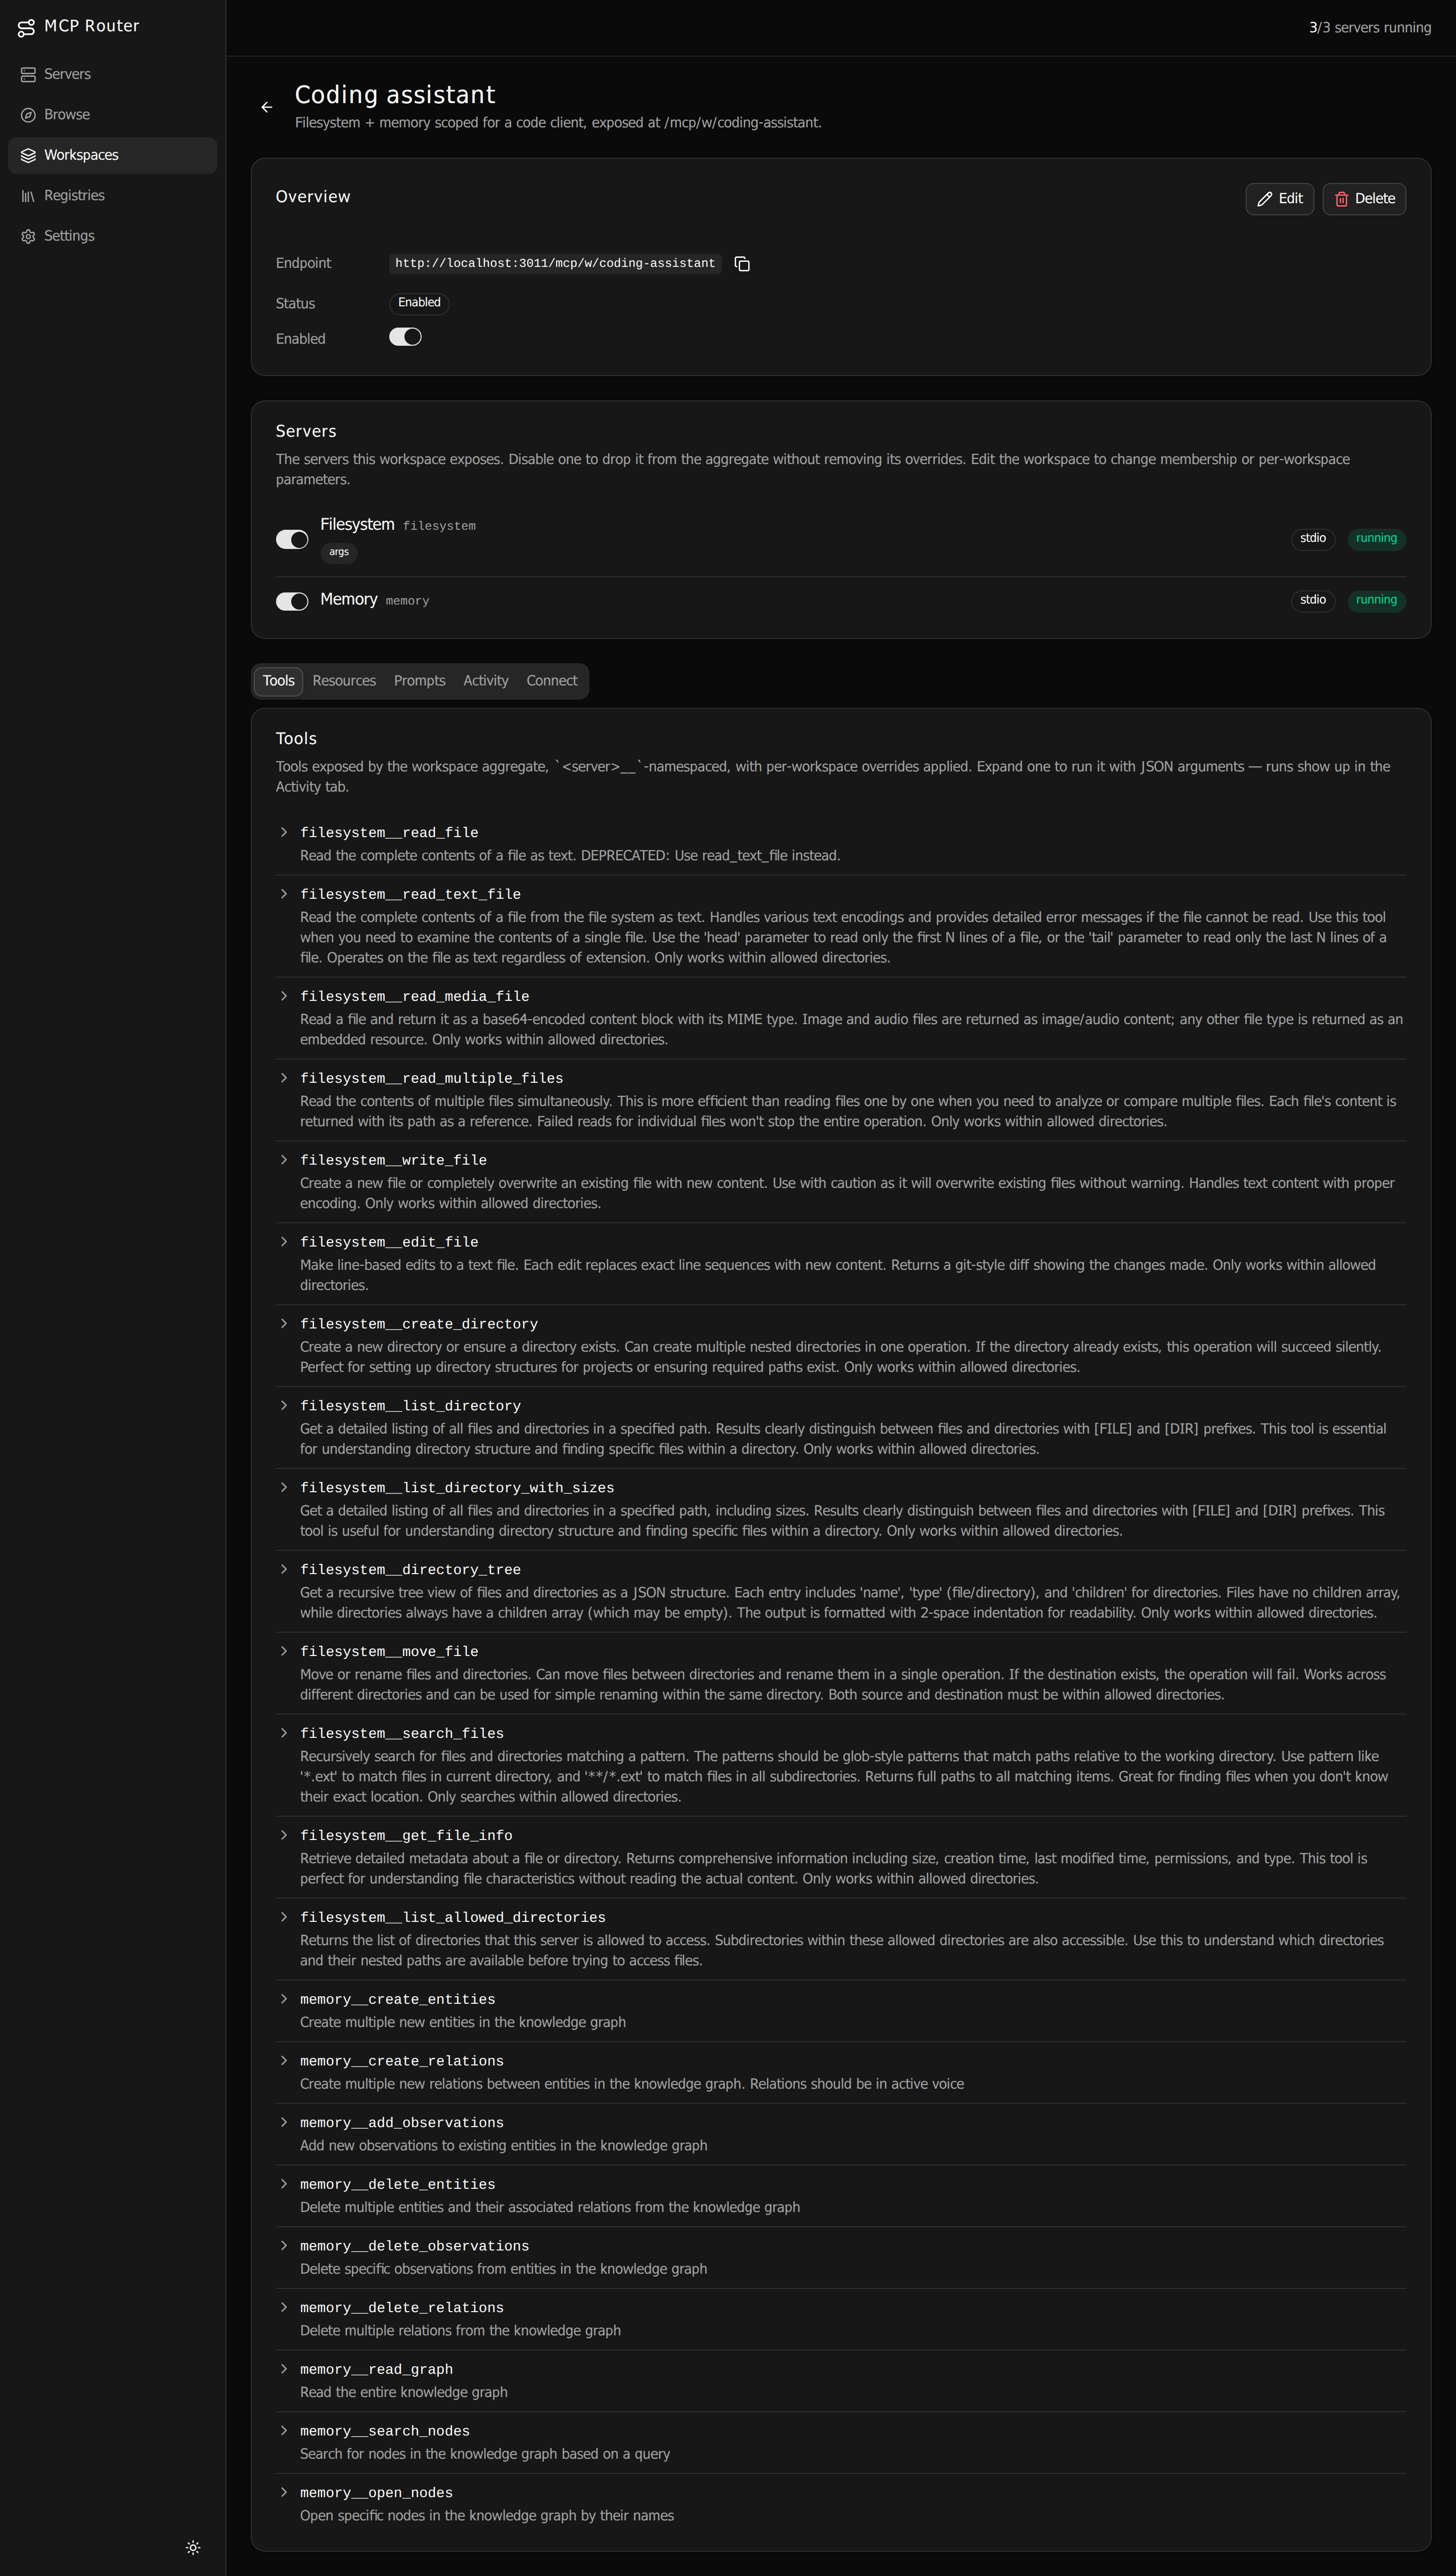
claude mcp add --transport http coding http://localhost:3000/mcp/w/coding-assistant \
  --header "Authorization: Bearer <token>"
You're up — where to next
You've gone from an empty install to a tested, connected MCP server (and optionally a workspace). From here:
- Install more servers from the registry, npm, or PyPI — or proxy remote HTTP servers.
- Hand-edit the flat JSON under
DATA_DIR/configand reload; unknown keys survive round-trips. - Tune session lifetime, allowed origins, and the idle timeout in Settings.