Get started
From nothing to a working skills server
This walkthrough takes you from an empty machine to a running MCP Skills Manager with a skill you can call from an agent. Every step has a screenshot of the web UI (in dark mode). It should take about five minutes.
Install and run
The quickest path is Docker — nothing to clone or build. All state lives in ./data, mounted
into the container, so your skills and config stay on the host.
docker run -d -p 3000:3000 -v ./data:/data \
  -e MCP_SKILLS_TOKEN=your-secret-token \
  vantreeseba/mcp-skills-manager:latest
Prefer to run from source? With Node ≥ 22.18:
git clone https://github.com/cubicecho/mcp-skills-manager && cd mcp-skills-manager
npm install
npm run build
MCP_SKILLS_TOKEN=your-secret-token npm start
On first run, if you don't set MCP_SKILLS_TOKEN, a random
bearer token is generated into data/config/settings.json and printed to the logs. The server
also seeds a starter getting-started skill so there's something to see right away.
Open the web UI
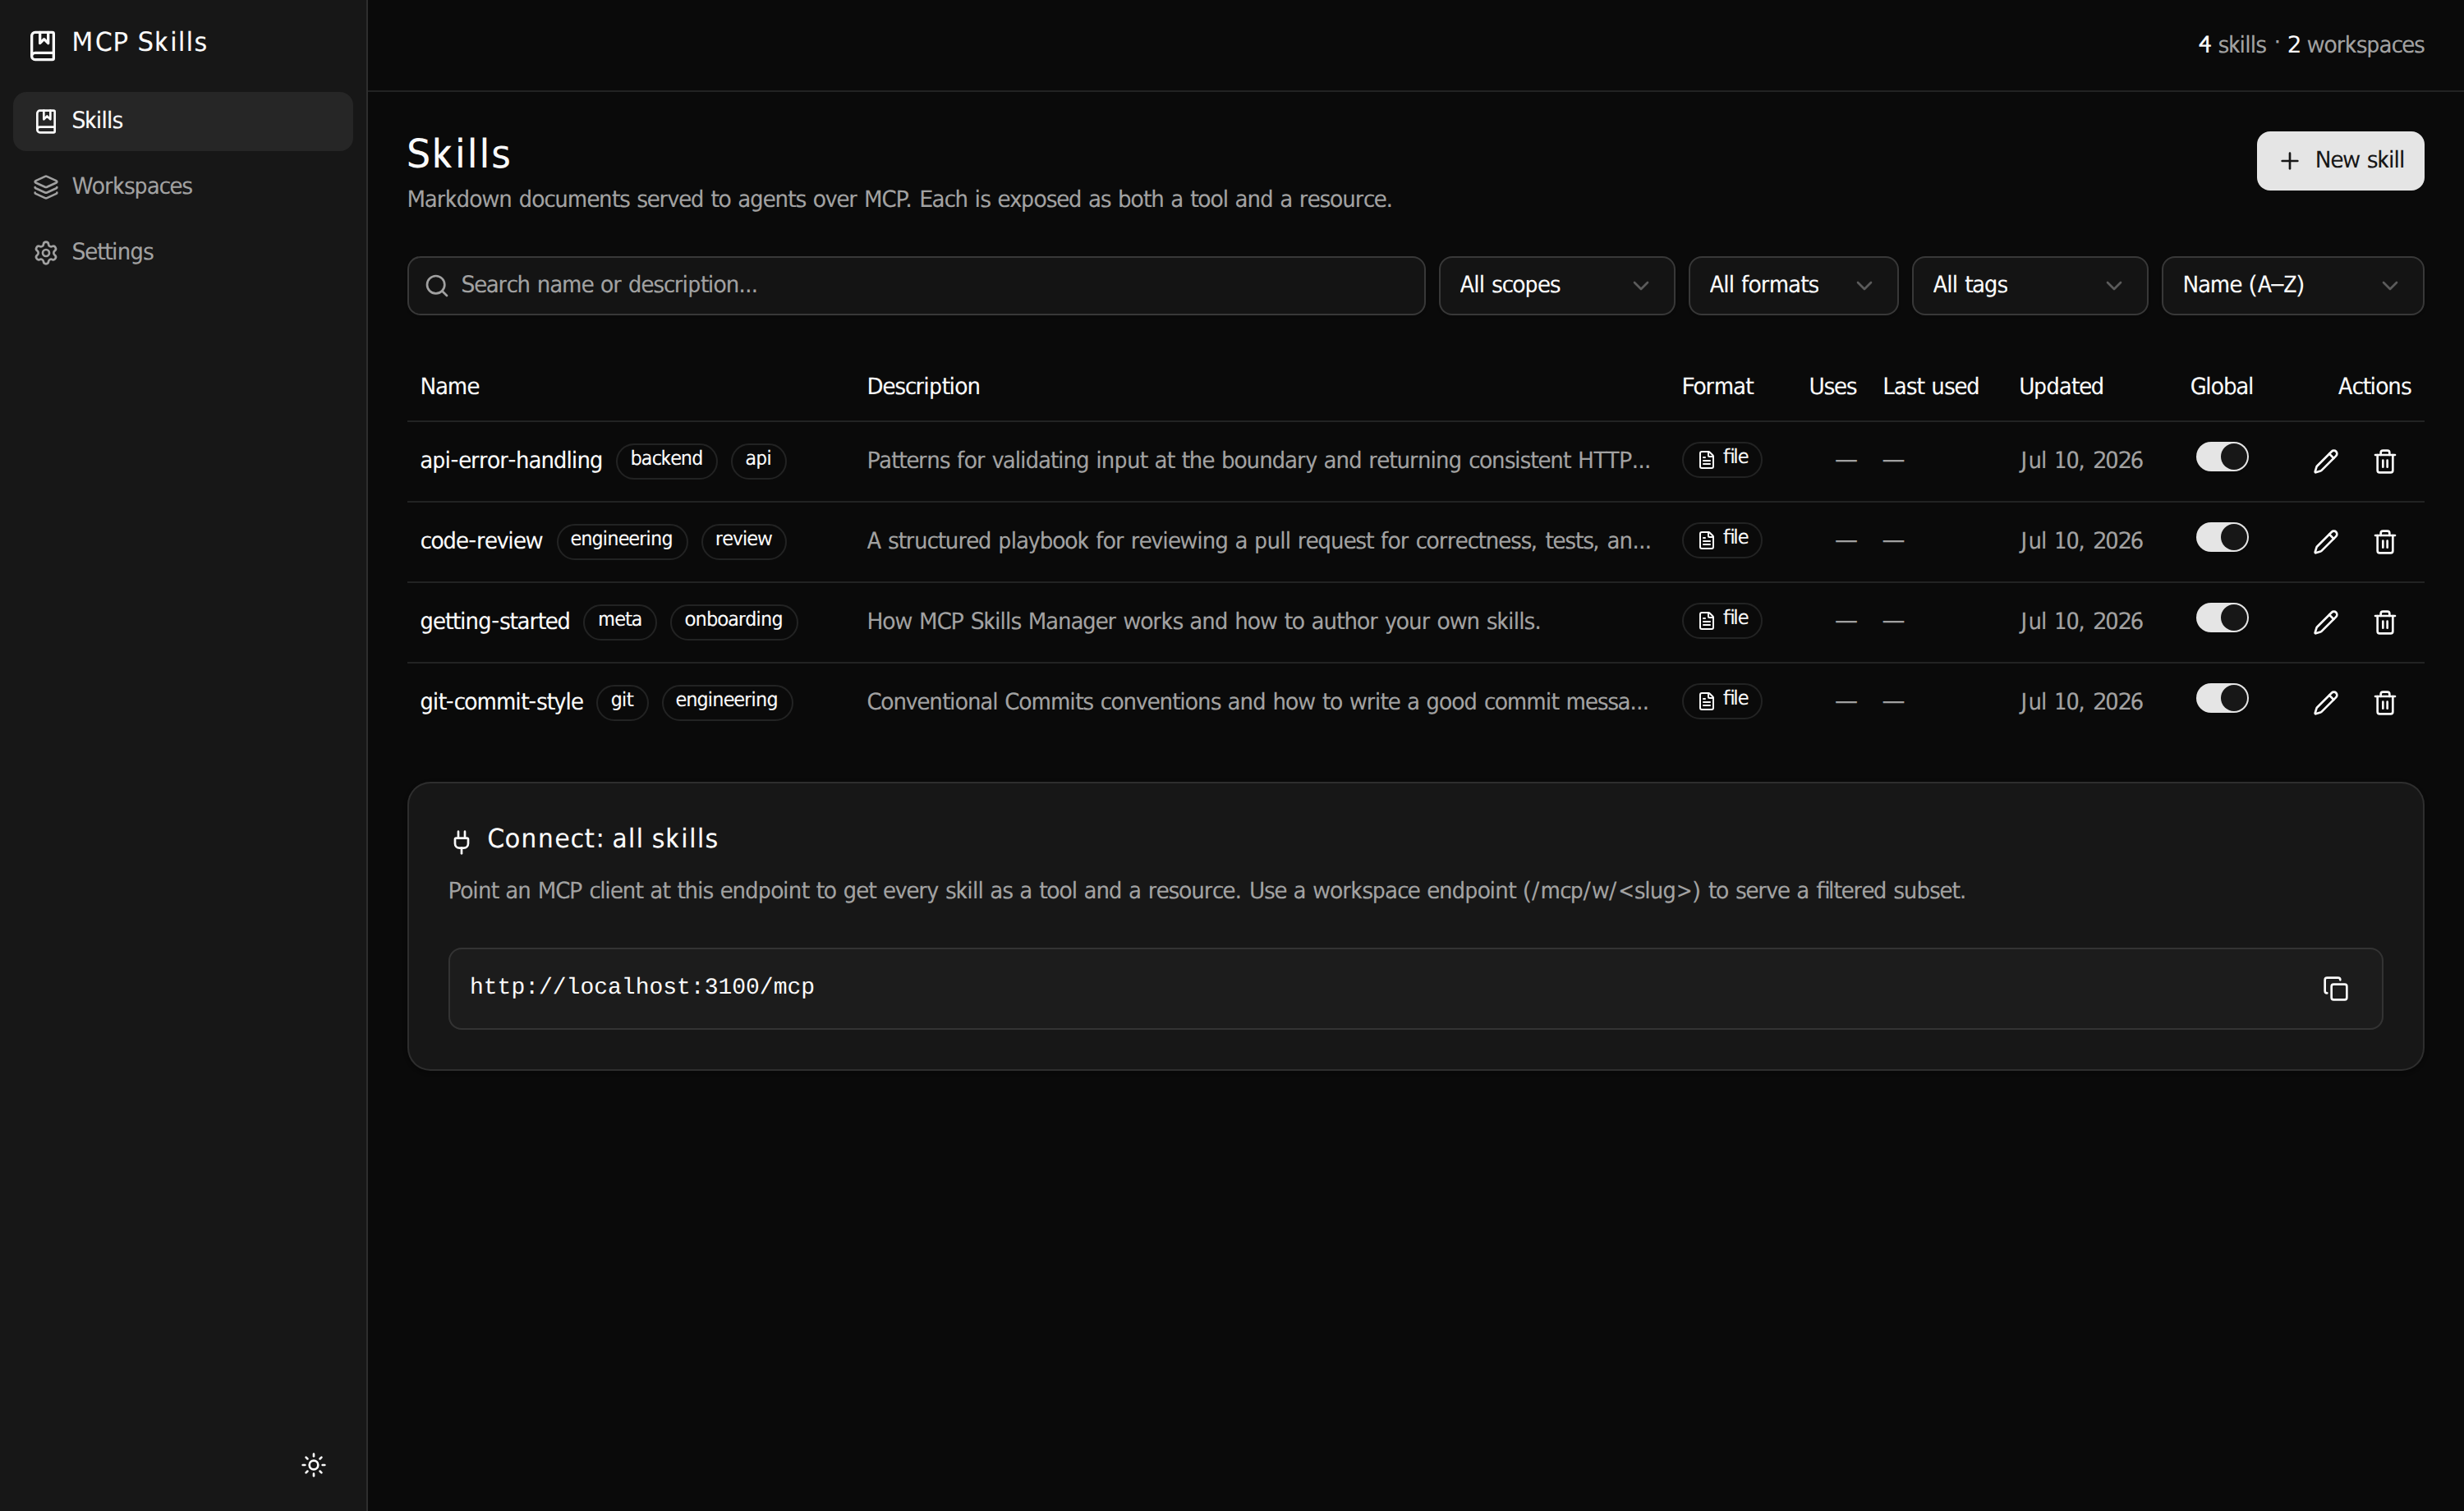
Visit http://localhost:3000 and paste your token when prompted. You'll land on the
Skills page — every skill served by the root /mcp endpoint, each of which is
both a callable tool and a skill:// resource. The connect card at the bottom shows the exact URL
to hand a client.
Create your first skill
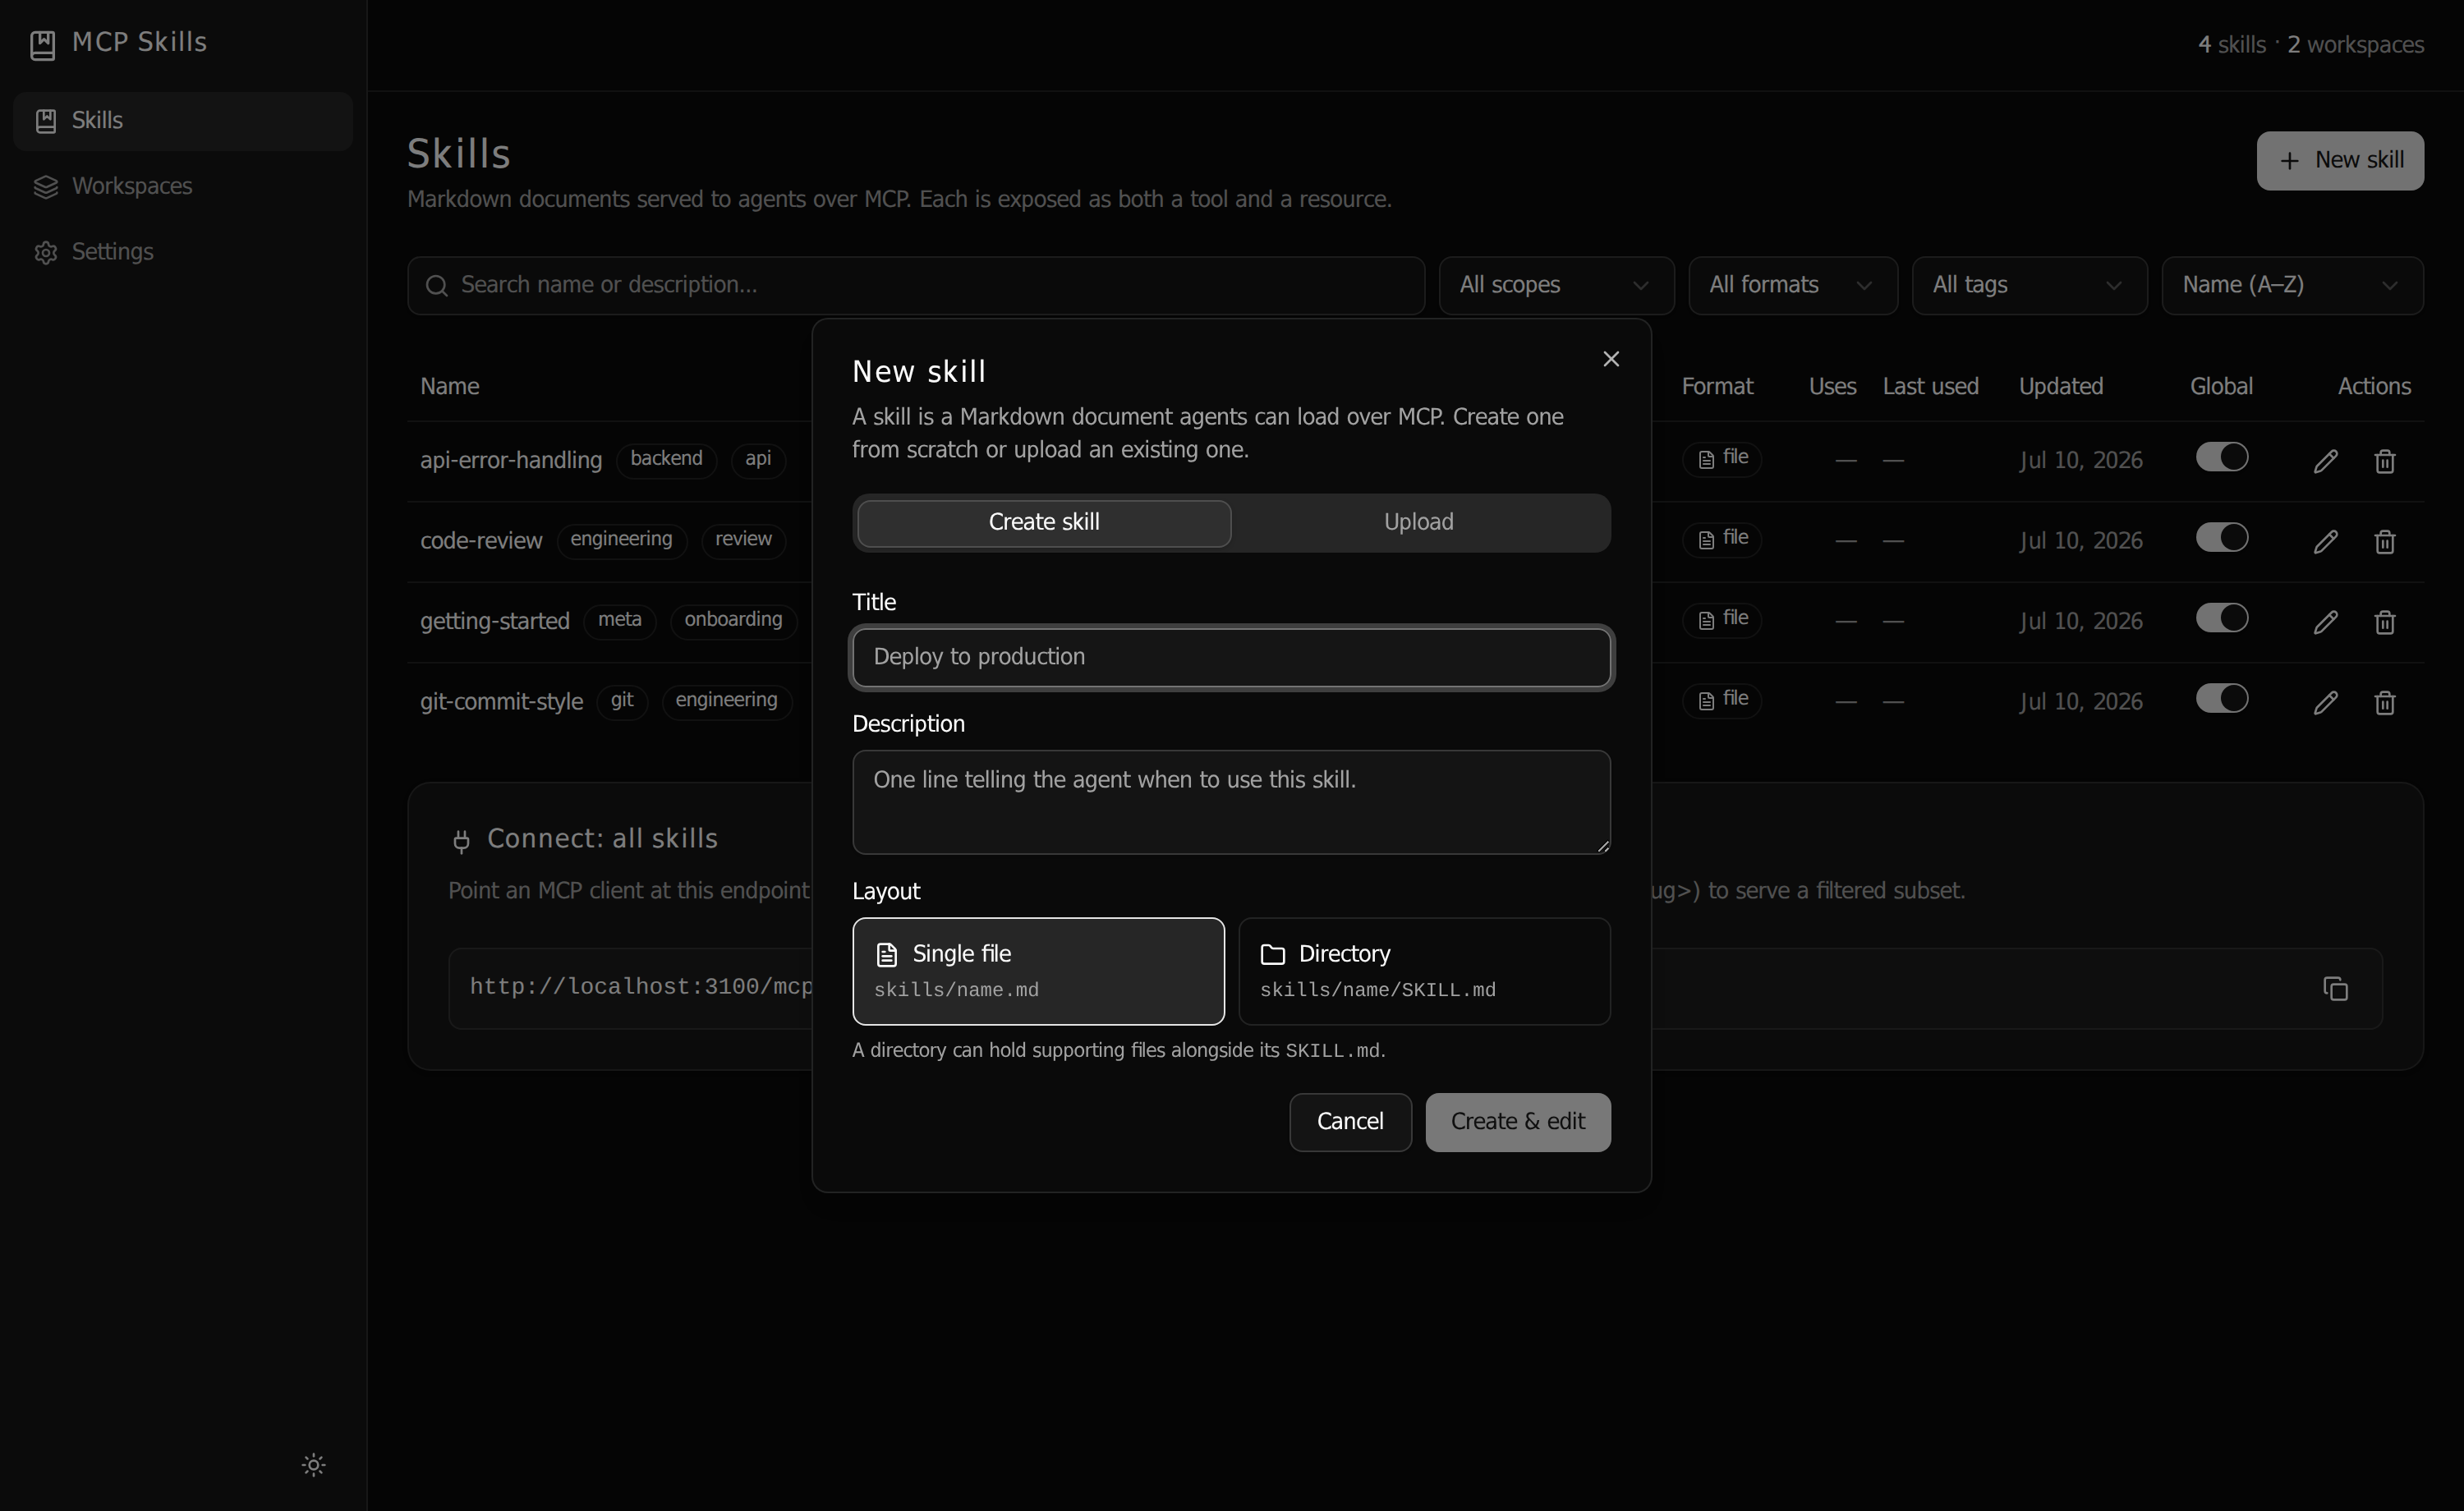
Click New skill. Give it a title (which becomes its slug) and a one-line description that
tells an agent when to use it. Pick a layout: a single <name>.md file, or a
<name>/SKILL.md directory that can hold supporting files. The second tab lets you upload an
existing .md, folder, or .zip instead.
Write it in the editor
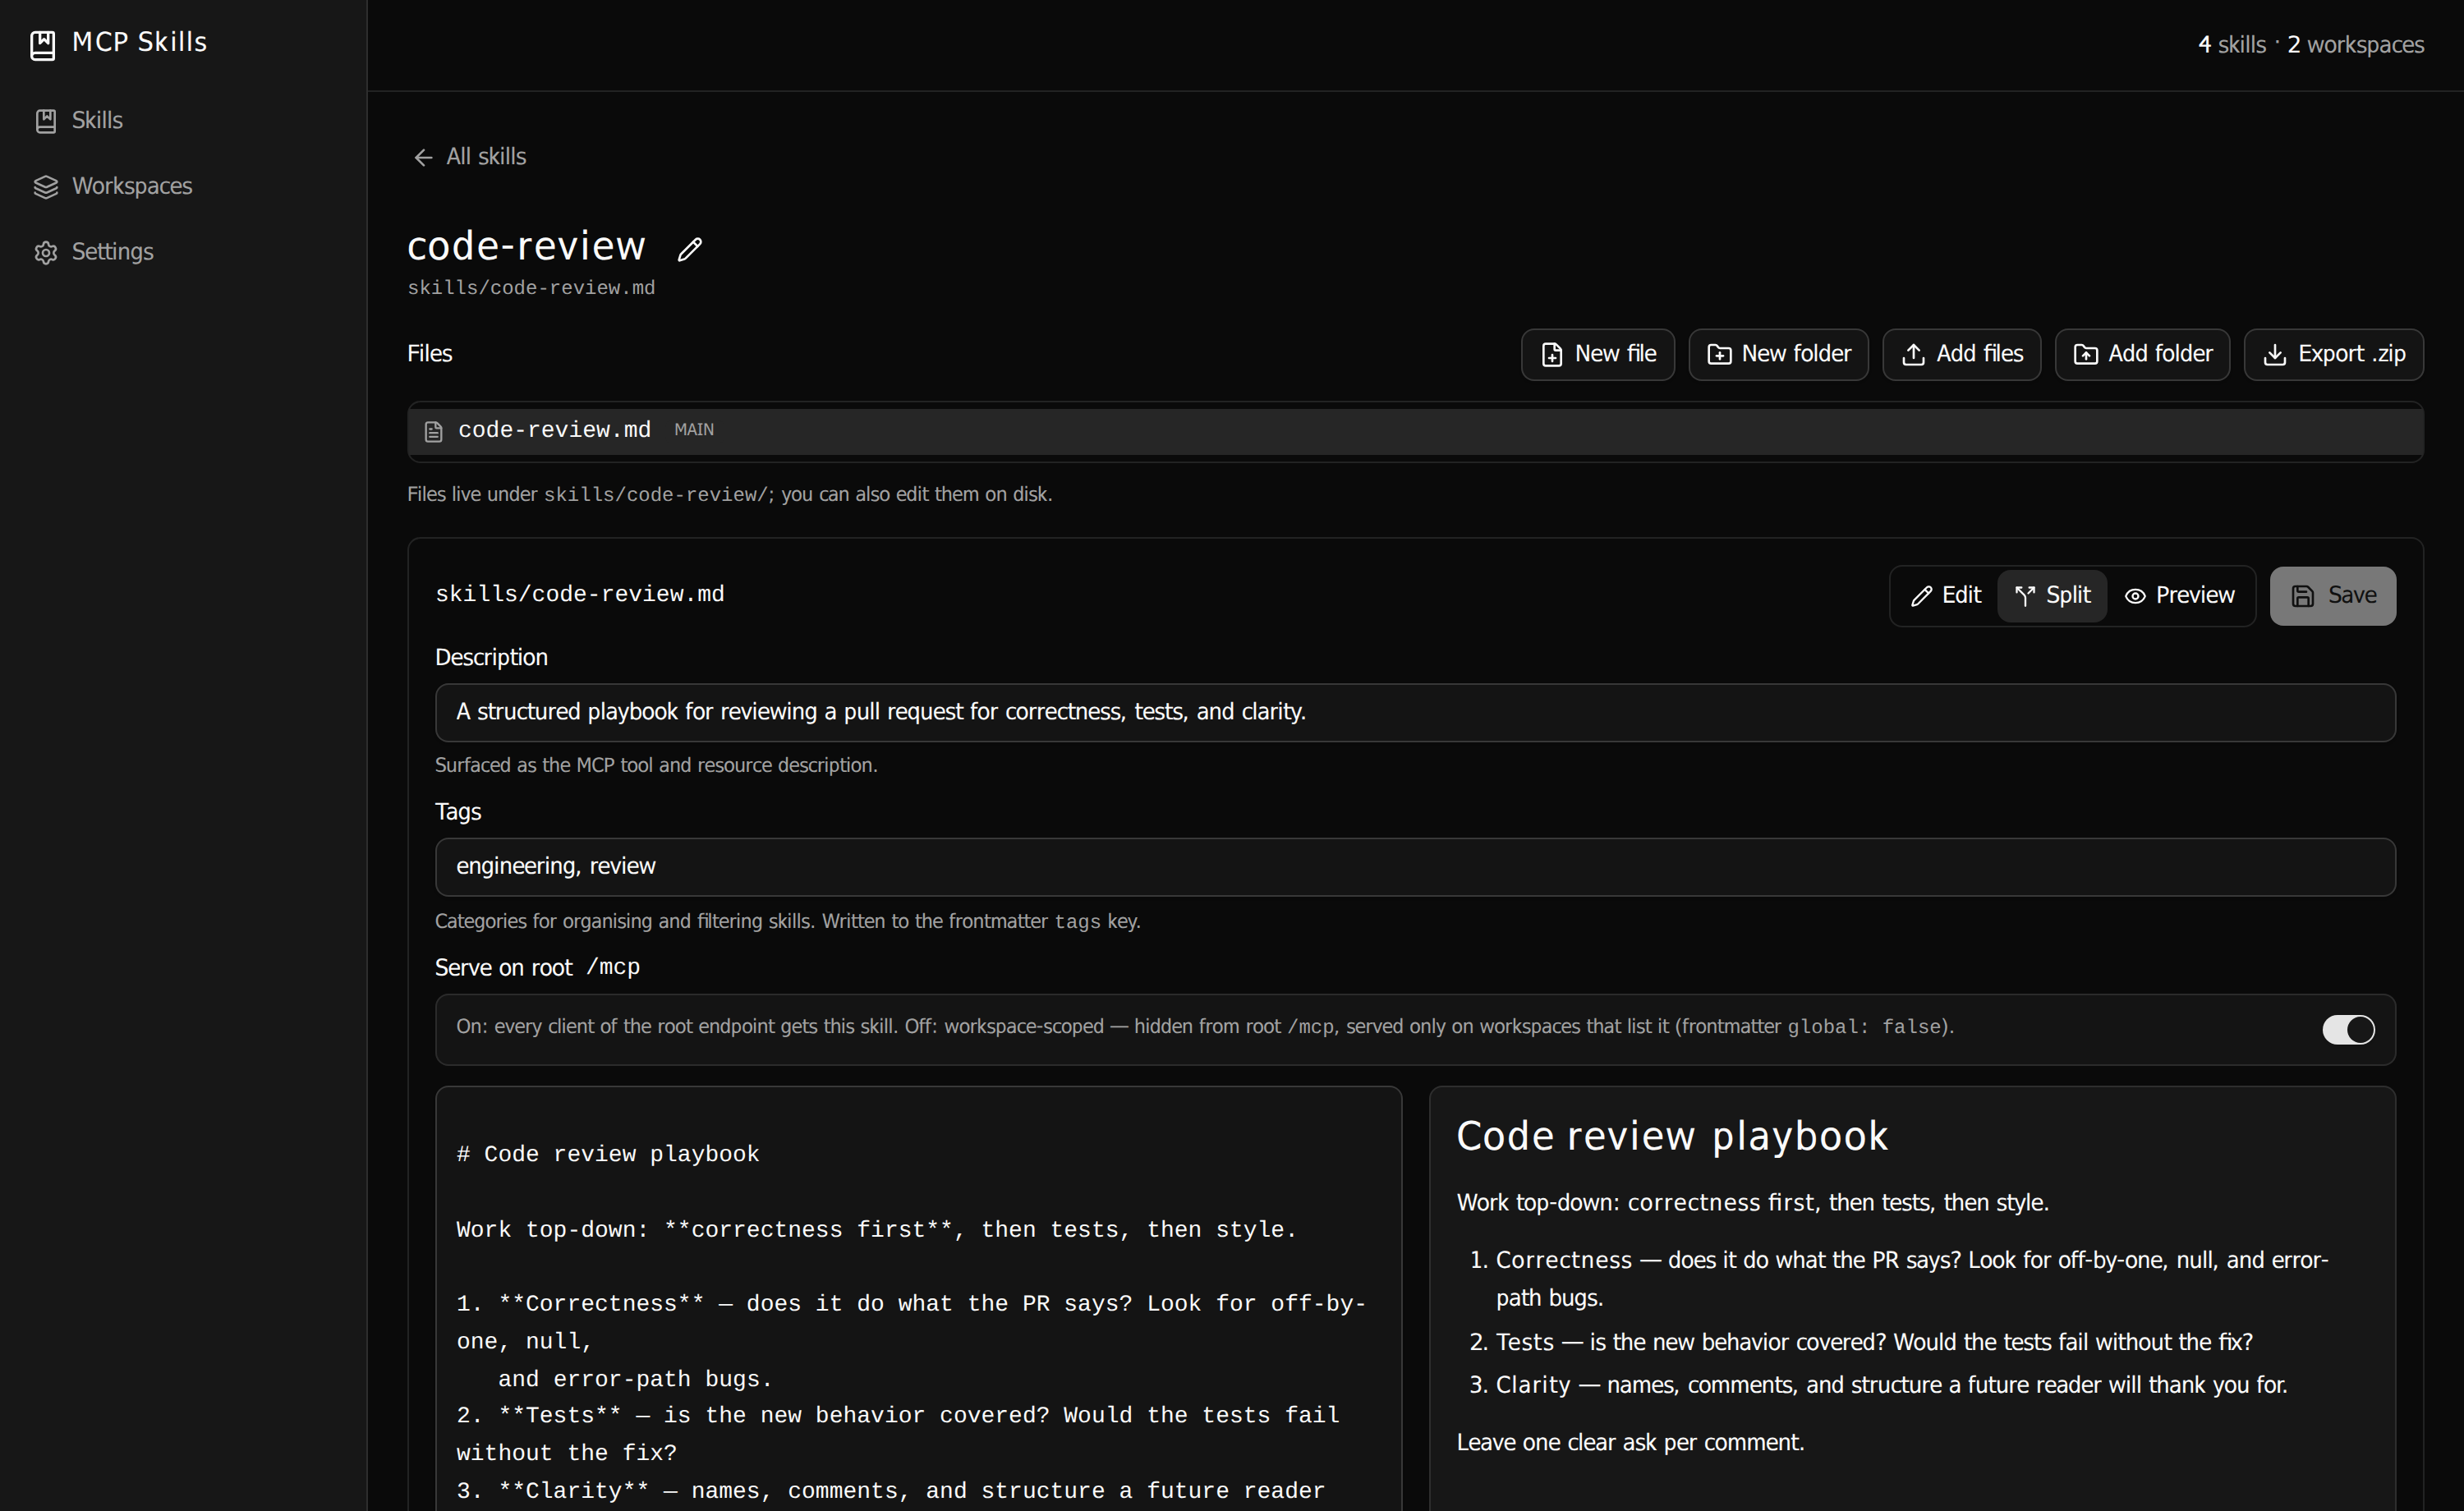
Creating a skill drops you into the editor. Write markdown on the left and watch the rendered preview on the
right (or switch to full Edit / Preview). Set the description and tags, and
use the Serve on root /mcp toggle to decide whether every client sees this skill
or only the workspaces that list it. For directory skills, the file tree above lets you add, upload, rename,
and export supporting files.
Group skills into a workspace
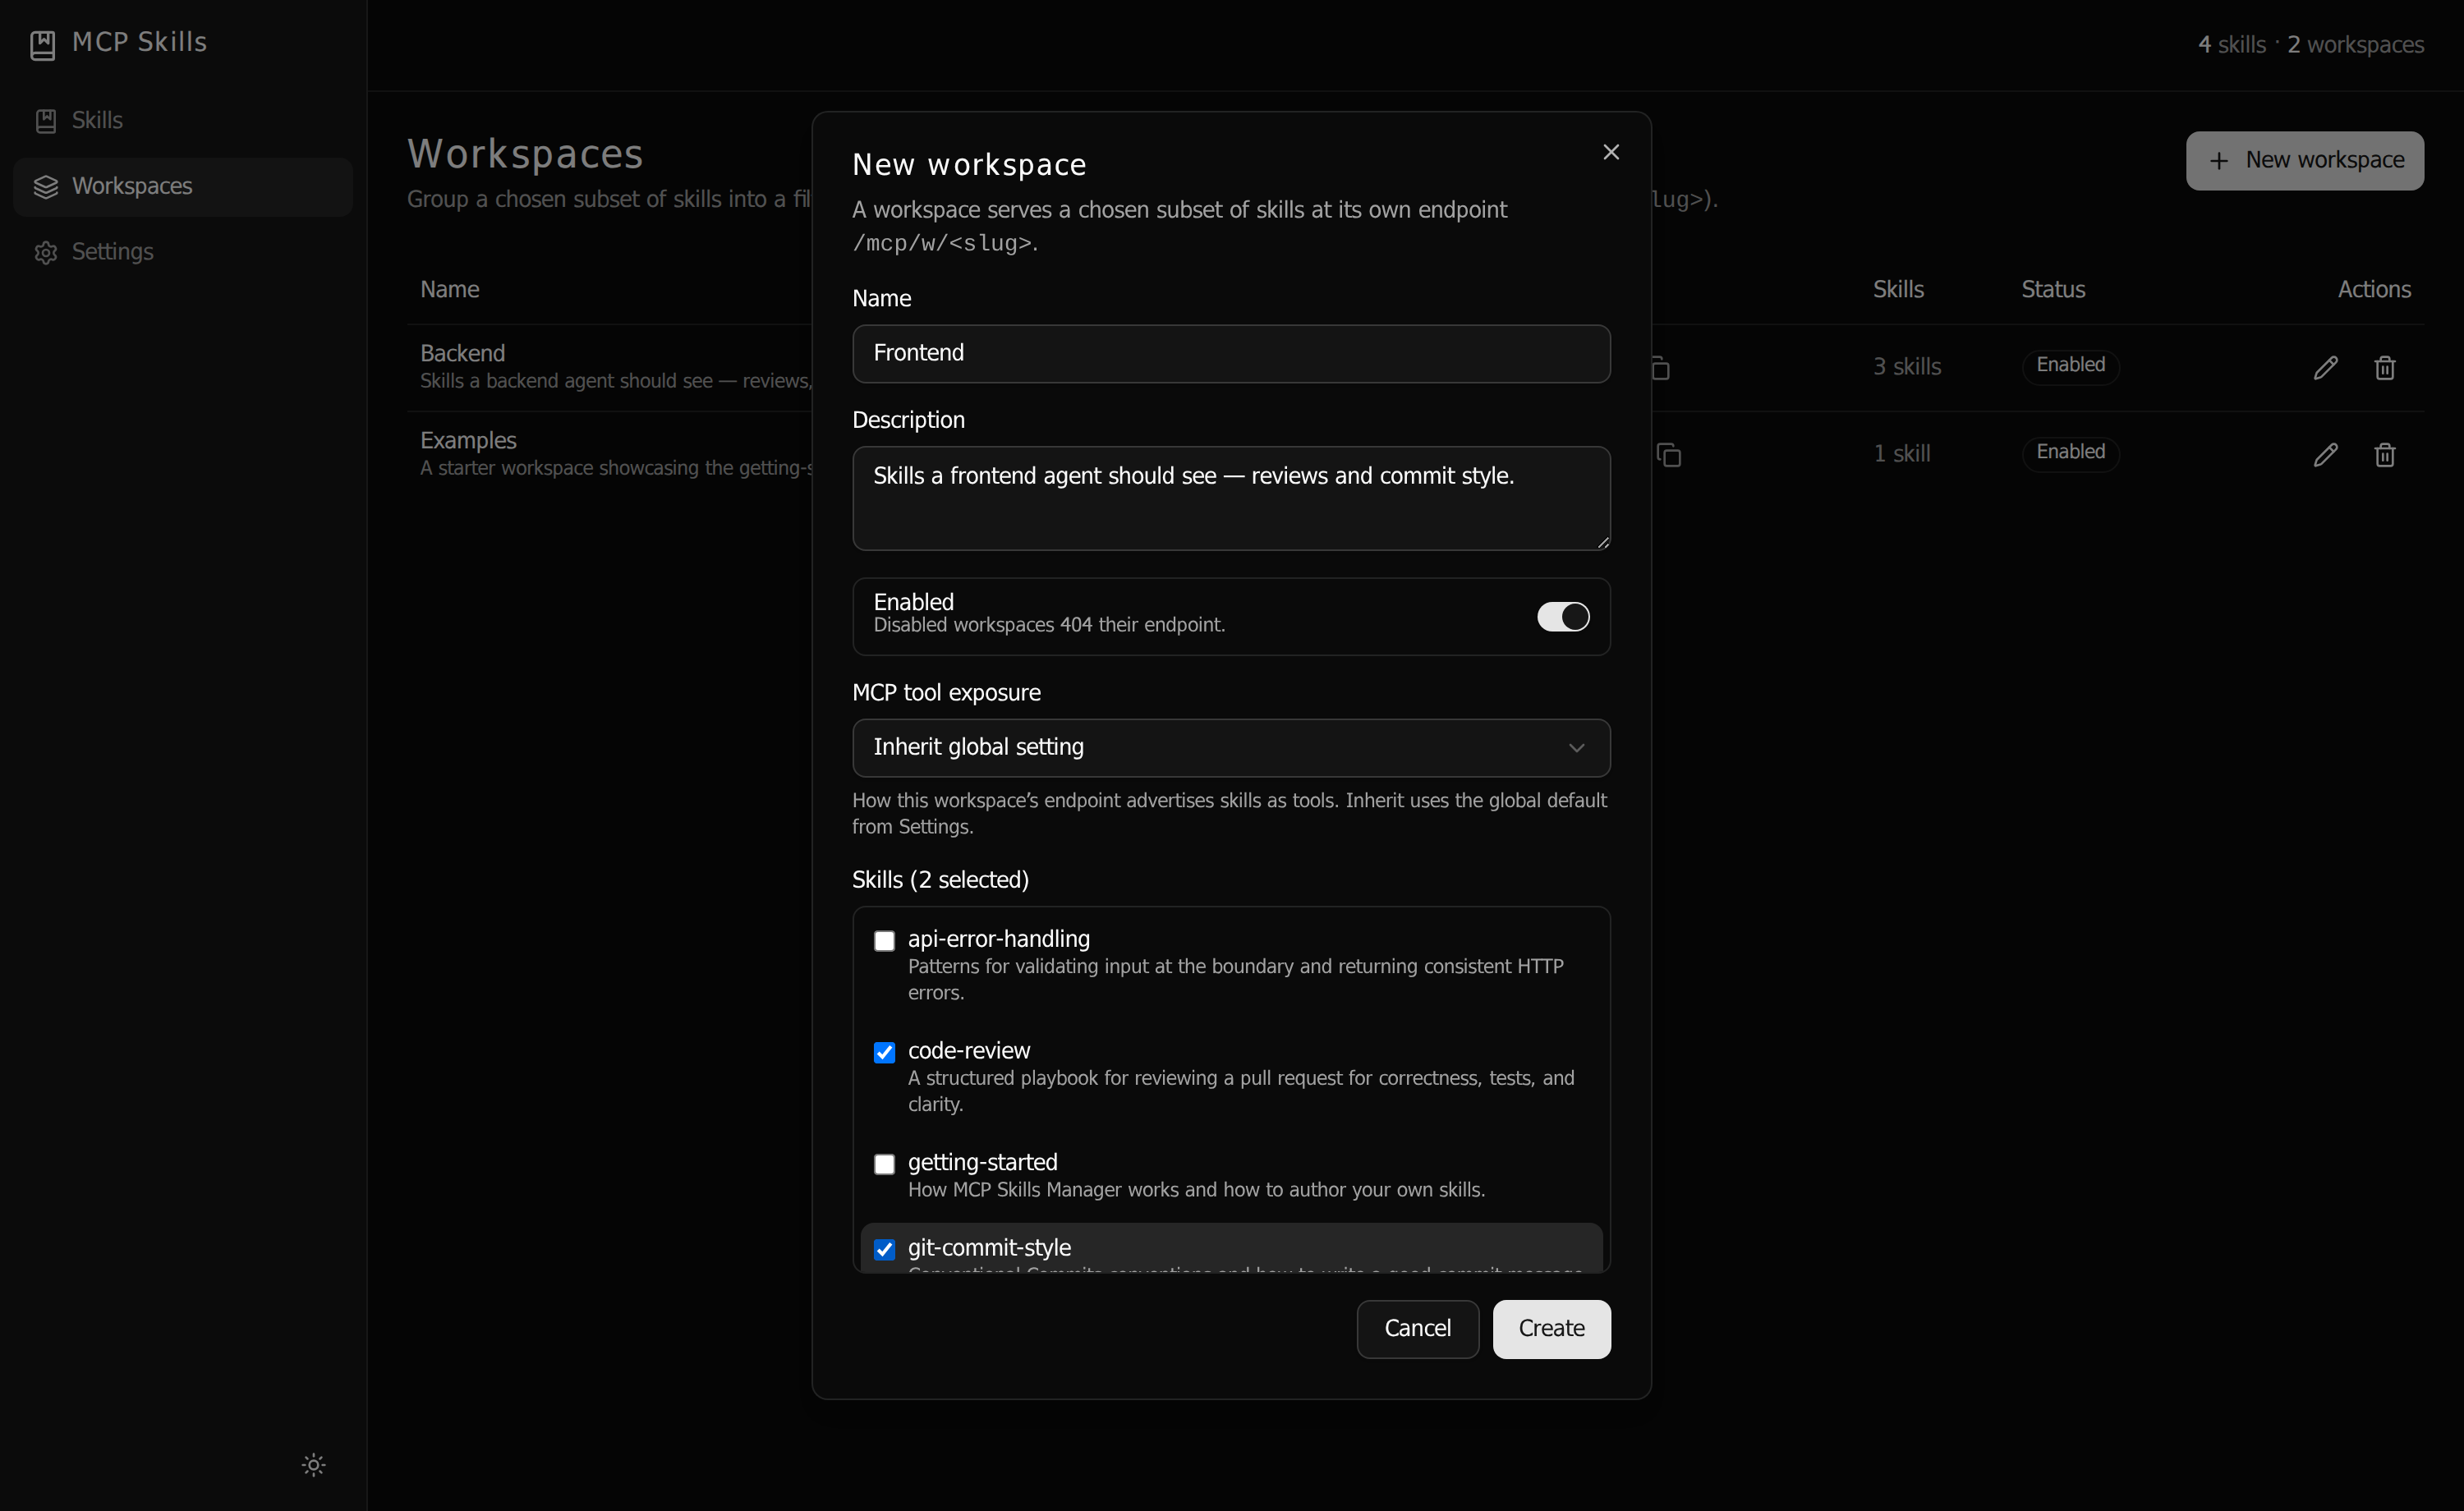
A workspace is a named subset of skills served at its own /mcp/w/<slug>
endpoint — so you can hand each agent exactly the skills it needs. Open the Workspaces page,
click New workspace, name it, and check the skills to include. You can override the tool-exposure
mode per workspace, or disable it to make its endpoint return 404.
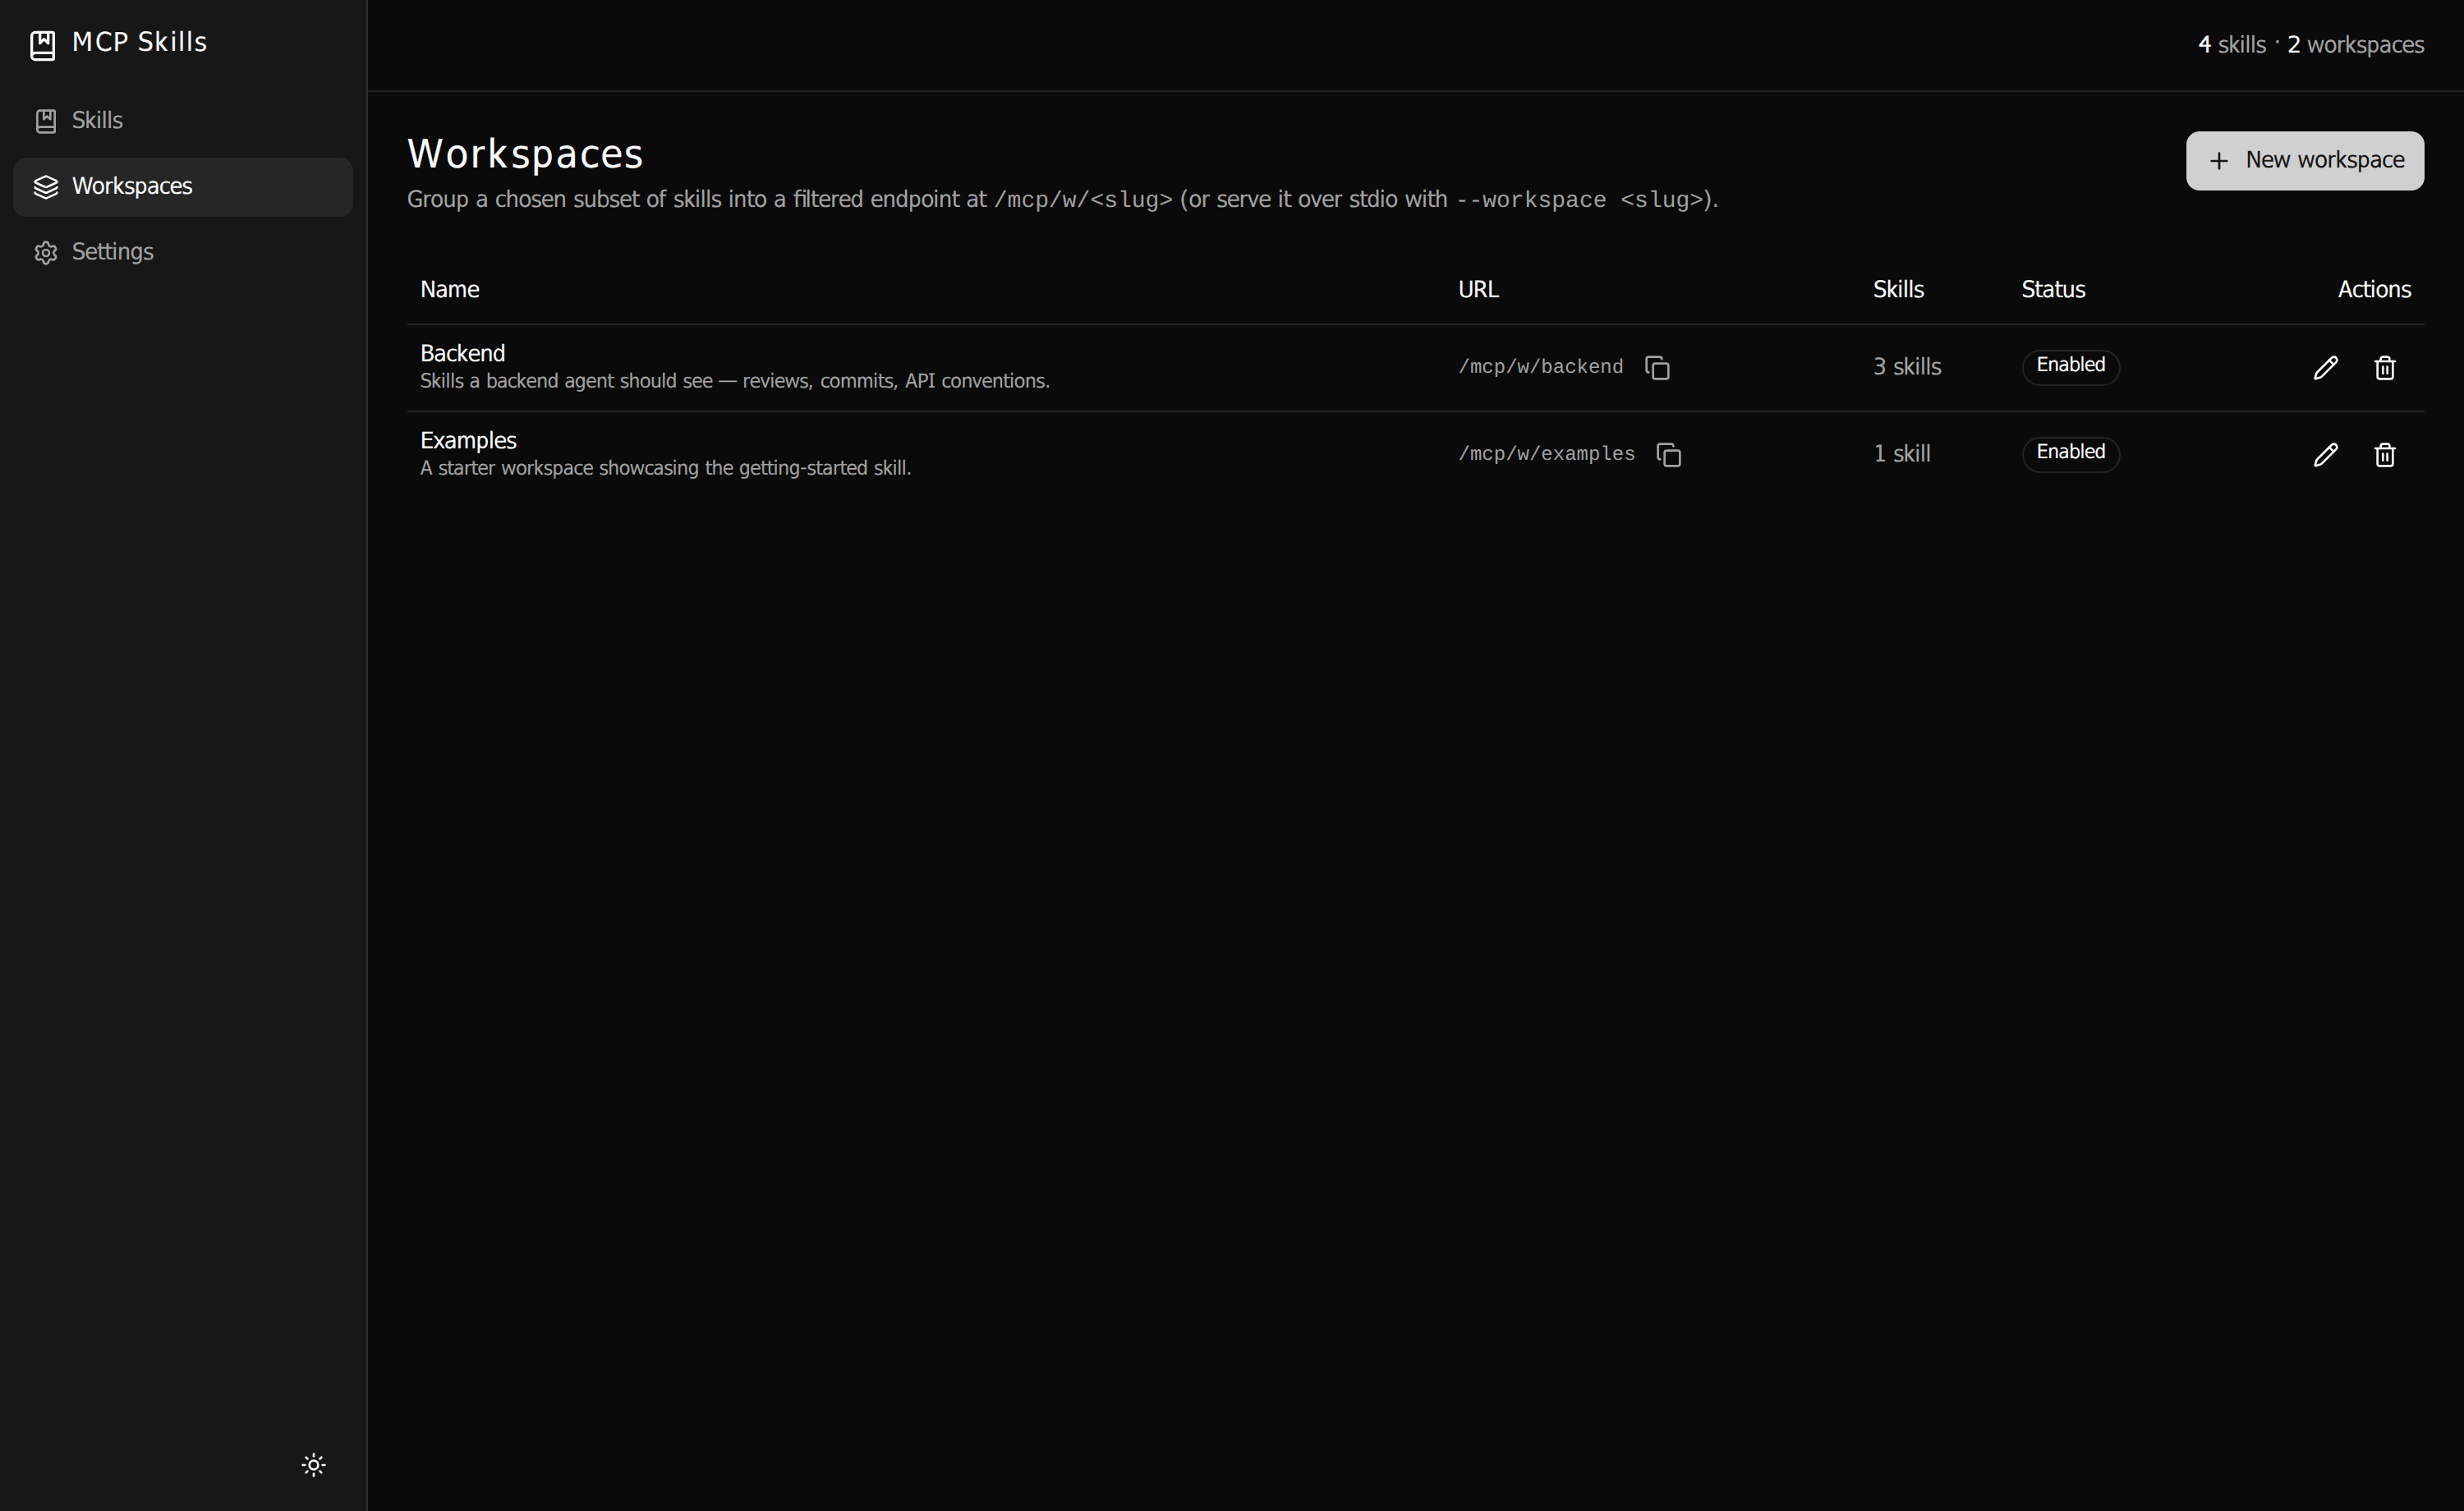
/mcp/w/<slug> URL, also reachable over stdio with --workspace <slug>.Connect an agent
Point an MCP client at your server. For Claude Code over streamable HTTP:
# all skills
claude mcp add --transport http skills http://localhost:3000/mcp \
  --header "Authorization: Bearer <token>"

# just one workspace
claude mcp add --transport http backend http://localhost:3000/mcp/w/backend \
  --header "Authorization: Bearer <token>"
Or run it locally over stdio with the packaged binary — scope it to a workspace with
--workspace:
{
  "mcpServers": {
    "skills": {
      "command": "mcp-skills-stdio",
      "args": ["--data-dir", "/path/to/data", "--workspace", "backend"]
    }
  }
}
Your agent now sees each skill as a tool (call it to load the body) and as a skill:// resource.
It can also discover skills first with the list_skills and search_skills meta-tools,
then load only what's relevant.
Configure to taste
The Settings page shows server status and the main switches: MCP tool exposure
(one tool per skill, or a single load_skill loader), agent authoring (let agents
create and refine skills over MCP), and HTTP live updates (push resource-change notifications
over SSE). Everything here is also editable directly in settings.json.
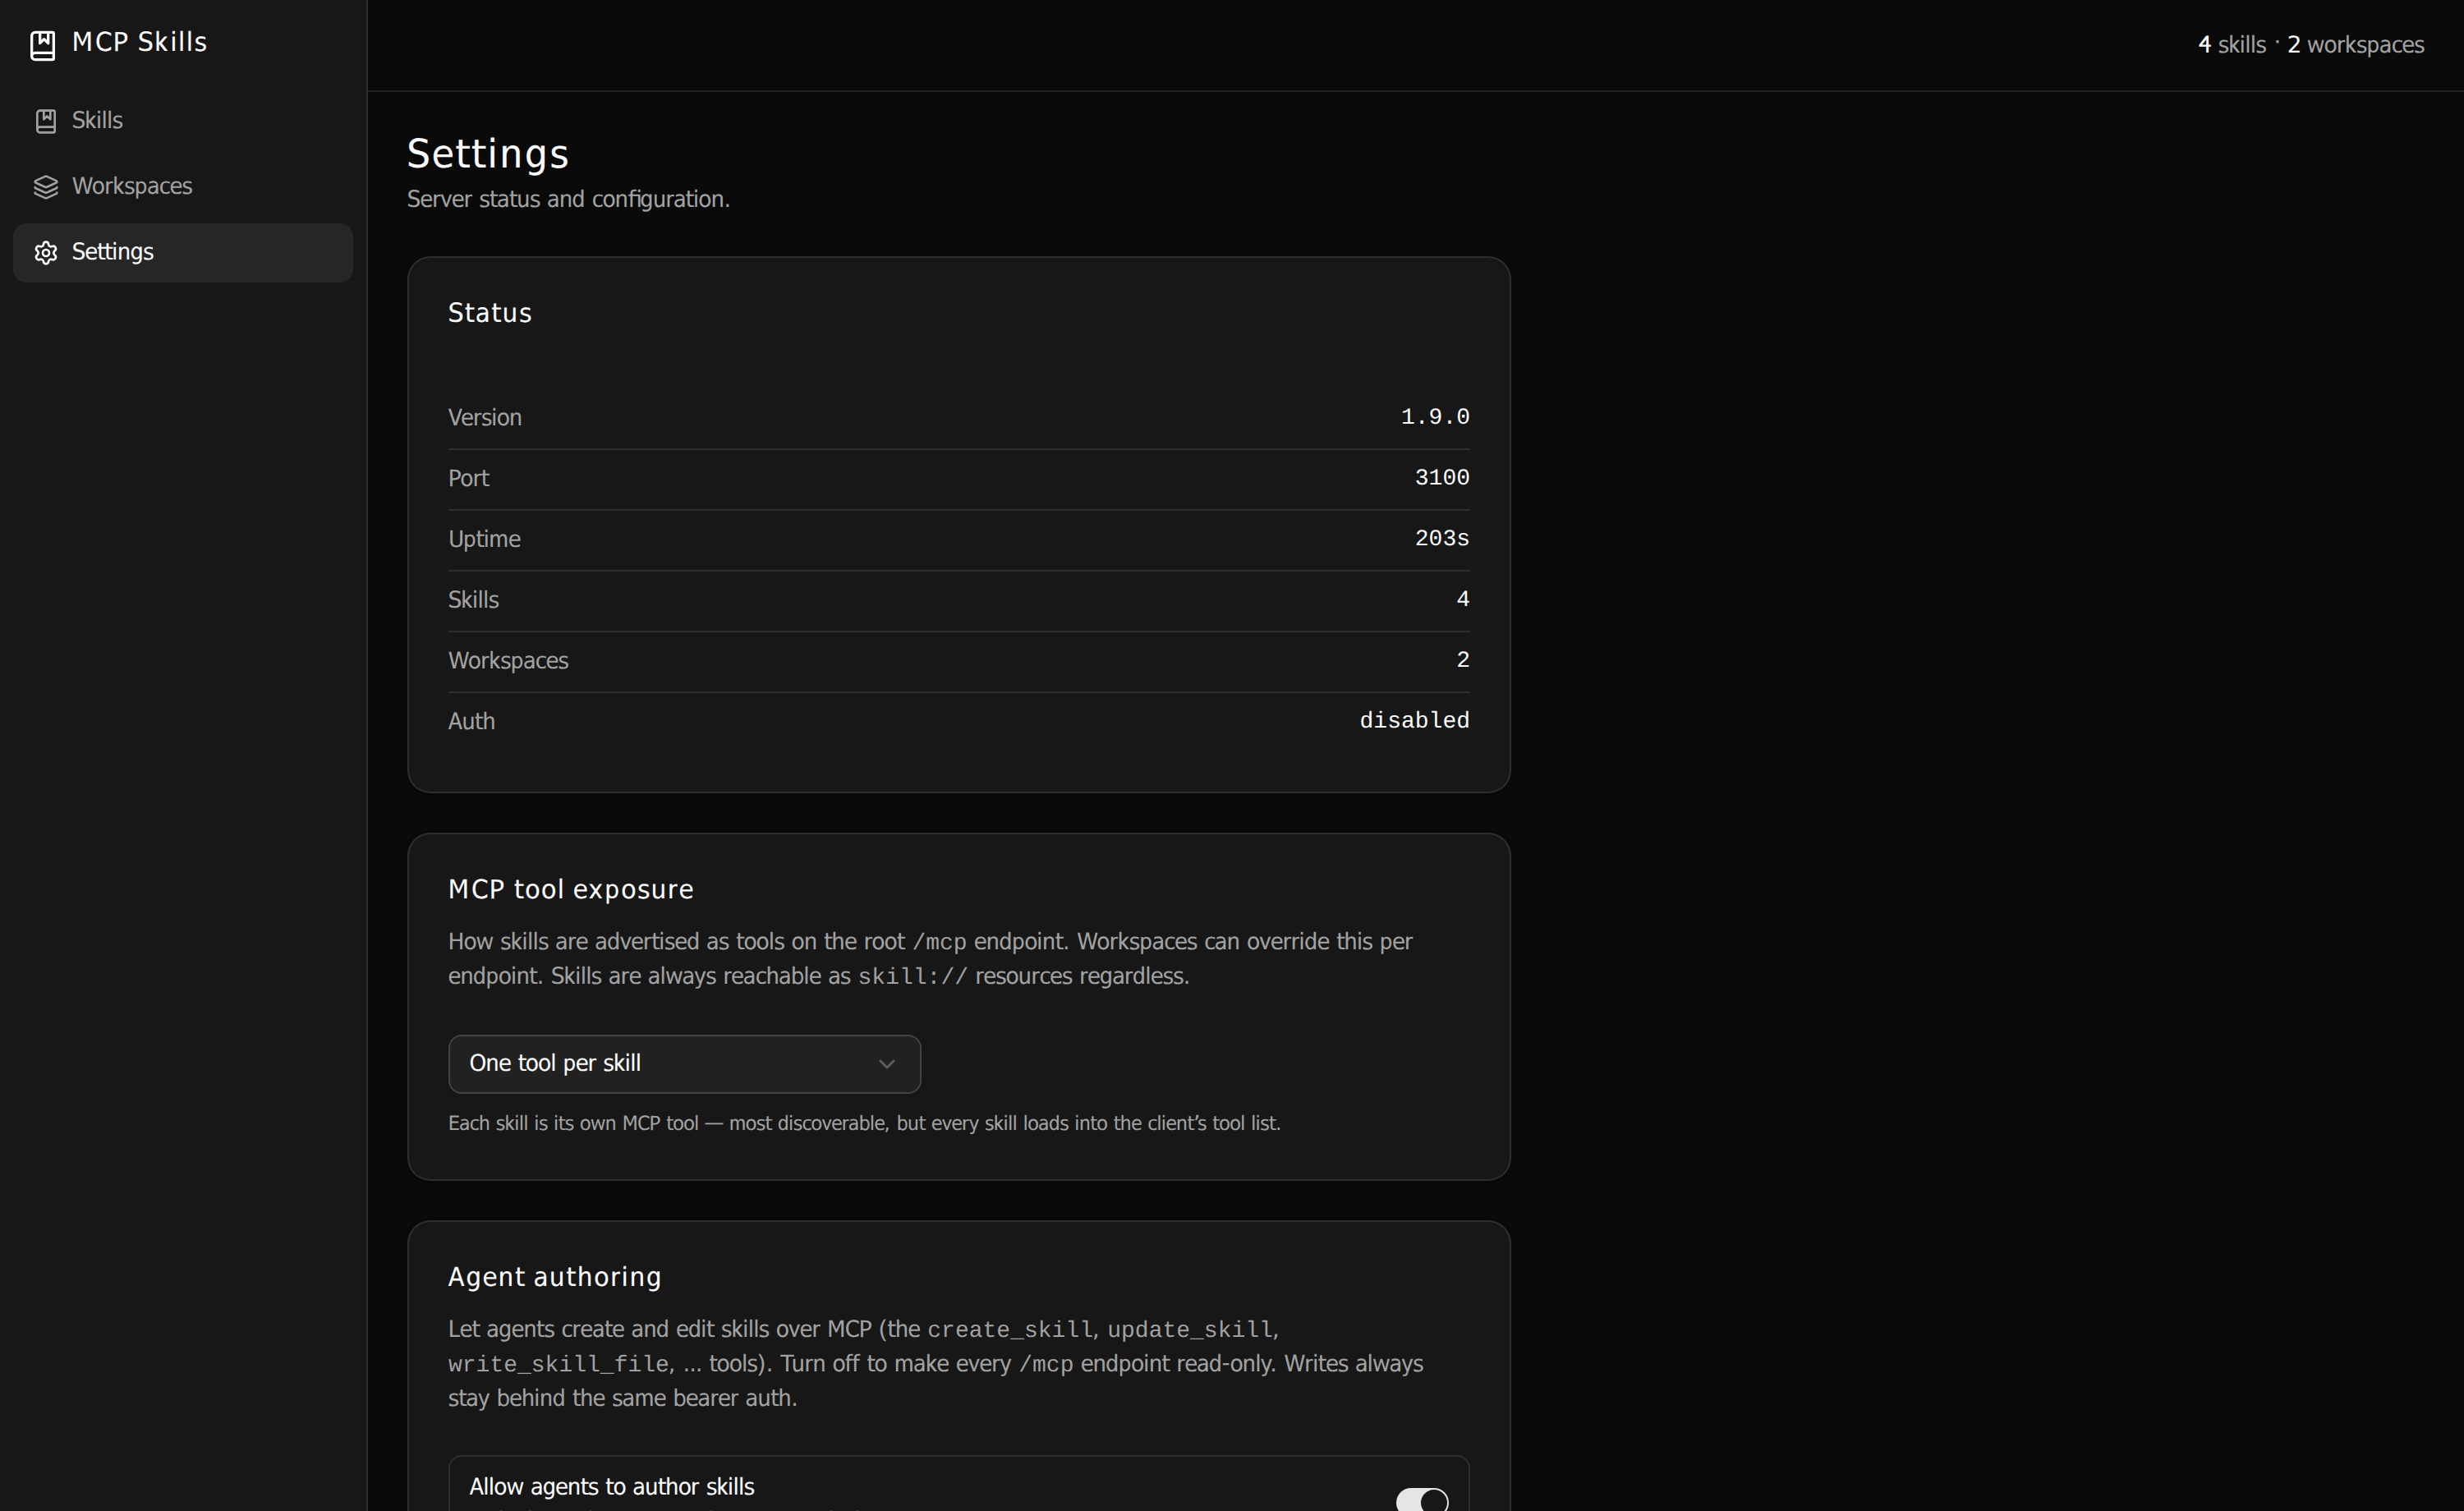
settings.json.That's it — you're serving skills.
Add more skills, split them across workspaces, and let agents author their own. For the full reference — frontmatter, the REST API, resources, and security notes — read the docs.